Lab 1: Raspberry Pi
When you're done with this lab you will have done the following things:
- Set up your Pi with the Raspbian operating system
- Connect your Pi to the on-campus WiFi so you can control it via SSH from your laptop
- Practice with the Pi
- (Optional) Fix a broken image by hacking the raw binary file
The last (optional) item does not have to do with the Pi, so can be done even if you are having issues that delay the setup of your Pi.
Part 1: Pi Setup and Control
Goals of this section:
- Set up your Pi so it's connected to the Internet via WiFi, and available for SSH connections.
- Control your Pi, i.e. run the Pi's command line terminal, remotely via SSH from your laptop.
If you haven't yet, please complete the prelab.
Pi Setup - 3 options
In any case, you will need the following equipment:
- Your laptop (with Windows... if you use Linux or Mac, the instructions will be a little different)
- A Raspberry Pi 3 model B or Pi 4 project board.
- A micro SD card (at least 8GB)
- An adapter that will let you plug the micro SD card into your laptop.
- A 2.5A micro USB power adapter (or another way to get 2.5 amps into the pi).
You should be on campus for this, as the goal is to connect to campus WiFi. There are several options for performing the setup, depending where you are on campus and what equipment you have access to.
- Option 1. Set up with Display. (Simplest!) This can be done in the CSSE labs on campus, or if you have access to an display via HDMI, and USB mouse and keyboard. It connects your Pi to WiFi directly.
- Option 2. Set up with LCD. This can be done if you have access to some special devices from your instructor. It connects your Pi to WiFi directly, using some startup configuration,.
- Option 3. Set up Wired/Headless. This can be done with an Ethernet cord to connect your laptop and Pi. Your laptop uses Internet Sharing to give the Pi access to the internet, until you get the WiFi configured.
Click the appropriate link above, follow the instructions, then return here.
Pi Control
After the Setup step, you should have been able to ping your Pi successfully with a command like ping <rhit username>-pi.wlan.rose-hulman.edu from your Git Bash terminal. We are now ready to connect via SSH.
SSH to your Pi
Use the SSH protocol to connect to your pi. The username is
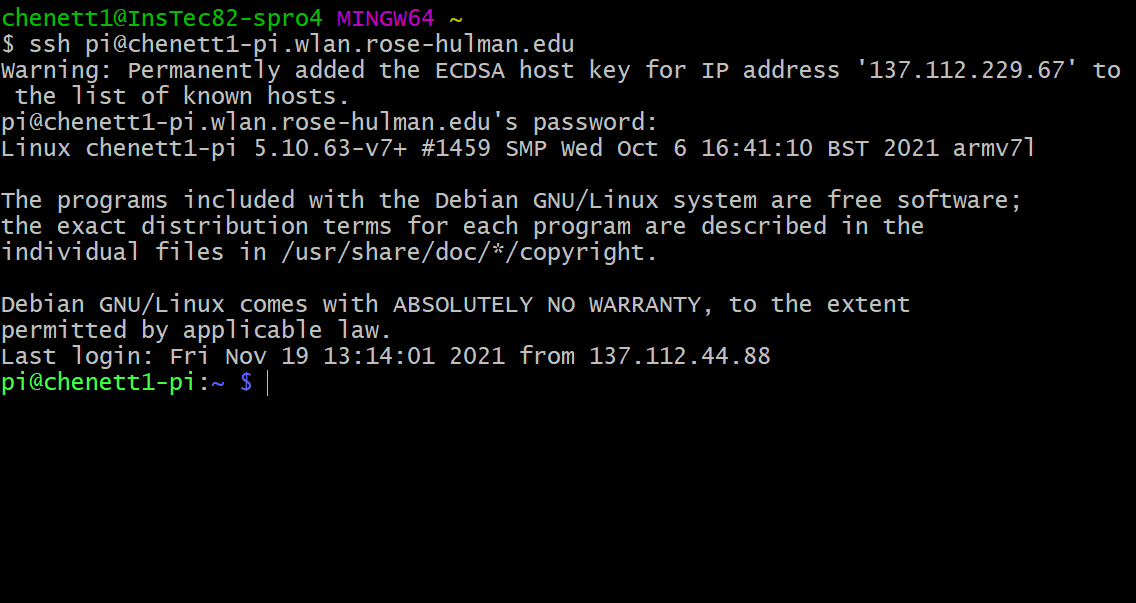
piand you'll use default passwordraspberry(unless you've already changed the password in the setup step). Also remember that your Pi's hostname is<rhit username>-pi, and it's connected through the RHIT WiFi, so the complete network address is<rhit username>-pi.wlan.rose-hulman.edu. For example, in Git Bash, you can use the commandssh pi@<rhit-username>-pi.wlan.rose-hulman.eduYou may be asked to add an ECDSA signature key, if so, say yes. If the SSH command complains that the key differs from a known key (say, after re-installing Raspbian), use the command
ssh-keygen -R <rhit-username>-pi.wlan.rose-hulman.edu(with your hostname) to remove the old entry and then retry the ssh command.- Here's what it looks like when you're connected:
Pi Configuration
In the terminal connected to the Pi, type sudo raspi-config
to pull up the main configuration menu. (sudo means to run with administrator privileges. If you just try raspi-config, it will deny access.)
Some of these steps may already be done, depending on what option you used to setup the pi. Feel free to skip those.
- Expand the Filesystem. The image you installed was intentionally small. If you have a small SD card, it will fit. It also fits big ones! In order to maximize the space on your card, select the
6 Advanced Optionsitem. In the menu that pops up, selectA1 Expand Filesystem. - Enable SSH. Use the arrow keys and enter to select
3 Interface Options, thenP2 SSH, and go through the steps to turn on SSH. - Change password. Use the arrow keys and enter to select the
1 System Options, thenS3 Password. Use this to change your password for userpi, to something somewhat secure that you will remember. Note that when you type the password, it will not display on the screen. (If you mis-type, you can always hit backspace a bunch of times, and start over.) - Change hostname. Use the arrow keys and enter to select the
1 System Options, thenS4 Hostname. Change to a name of the form<rhit username>-pi. For example, if your Rose-Hulman username is chenett1, usechenett1-pi. - Set WiFi Country. Choose
5 Localisation OptionsandL4 WLAN Country. In the menu, type "U" to quickly find "US" and select it by typing enter. - Select
<Finish>. For the settings to take hold, you must allow the Pi to reboot. - After giving time for the registration with EIT to work, try to connect to the RHIT-OPEN wireless network. You can do this using the wireless menu in the right corner of the menu bar.
(Optional) Connect your Pi to eduroam
RHIT-OPEN is unsecured, but we have found its connection to be more reliable for Pis. If for some reason you'd like to use eduroam (secured), type in the following commands:
pi@username-pi ~ $ sudo apt update
...
pi@username-pi ~ $ sudo apt install ca-certificates firmware-brcm80211
...
pi@username-pi ~ $ wget tiny.cc/cssepi3-wifi
...
pi@username-pi ~ $ sudo bash cssepi3-wifi
...
The script will prompt you for which network you want. It will ask for your RHIT username (not email) and password (even if you don't select eduroam) so it can authenticate to eduroam if you want to in the future. Follow the instructions and when it's complete, restart your pi.
SHOW YOUR INSTRUCTOR
Now is a great time to print out the instructor verification sheet and show your instructor.
Part 2: Practice with the Pi
Now it's time to play around with the pi through a terminal. When the pi is waiting for you to give it instructions, it'll show you a prompt. The prompt looks like this:
pi@username-pi ~ $
This means you are logged in as pi on a computer called raspberrypi and you are in the ~ directory (your home directory). The dollar sign ($) is a visual indication for you to type something.
For the rest of this lab, you're going to use a number of linux commands. Here's a quick reference for some of them:
cd <dir>: change directory. For example,cd foois like opening the folder "foo" and going inside.cd ..goes back up a directory.ls: show a list of the files in the current directorycat <file>: display the contents of a file.
Also, in order to run things as an administrator (for example, to install programs), you need to use a command called sudo. This temporarily turns you into an admin called root. Try it!
pi@username-pi ~ $ whoami
pi
pi@username-pi ~ $ sudo whoami
root
Stage 1: Install a command-line web browser
Since your sole access to the pi is via command line, lets install a browser that works in a text-only environment! To do this, we will use apt.
pi@username-pi ~ $ sudo apt install links
It will ask you if it's ok to install stuff. Type "y" and hit enter.
Once it's installed, launch it and see if you can view the course website! (Hint: hit the "ESC" key to show menus and "q" to quit).
pi@username-pi ~ $ links http://www.rose-hulman.edu/class/csse/csse132/
Stage 2: Install Git
Next, you need to install the git client so you can get your lab and homework materials. Use apt to install it!
pi@username-pi ~ $ sudo apt install git
NOTE: your Pi may already have Git installed. If it does, running this command will result in a message such as:
git is already the newest version
Stage 3: Use Git
Clone your class repository
Clone your repository using a command like this, replacing <username> with your RHIT username. NOTE: <username> appears twice; replace it both times. Use the git clone command:
git clone ssh://<username>@gitter.csse.rose-hulman.edu:/srv/git_repos/2122b-csse132-<username>
Use your RHIT password when asked for a password.
NOTE: GIT may ask you if you want to accept a key. Choose "yes".
Once it's checked out, use the cd command to go into the directory, and the ls command to show your repository's contents.
HINT: you can type part of the command (like "cd 1819" and then hit tab to auto-complete the directory).
pi@username-pi ~ $ cd 2122b-csse132-username/
pi@username-pi ~/2122b-csse132-username $ ls
lab01         lab02
pi@username-pi ~/2122b-csse132-username $
Configure Git
Next, you will have to tell Git your username and email address. Use the git config command to do this.
git config --global user.name "YOUR NAME"
(replace "YOUR NAME" with your name)
git config --global user.email youremail@rose-hulman.edu
(replace "youremail@rose-hulman.edu" with your Rose email address).
Create and push a new file.
Use the cd command to go into the lab01 folder. Once you're in there, create a new file called "itworks.txt":
- type
nano itworks.txtto create the file and edit it using nano. - Put your name in the file, and write a fact about yourself (for example, "I like cats").
- Save the file in nano (hold the Ctrl key and type the letter O)
- Exit nano (hold The Ctrl key and type the letter X)
Now that you've got the file, commit it to your git repository. First, pull any change from the server:
git pull
Then, you need to tell git about the file:
git add itworks.txt
Commit your changes:
git commit -m "added new file in lab 1"
Once it verifies your commit, it's time to upload your new file to the server.
git push
You've commited your first git file with your raspberry pi! Good job!
SHOW YOUR INSTRUCTOR
Check this item off the Instructor Verification Sheet.
Part 3: Fix an Image (Optional)
This part is done on your laptop, not the Pi. You will want to first clone your CSSE132 Git repo to some directory of your choice on your laptop. Hint: use Git Bash and follow analogous steps as you did when cloning the Git repo on your Pi.
In this part, you will need to tweak the data of an image file to help fix a broken image. To modify the raw data of a file, you need special tools to do that. Frhed is a free binary file editor available on Windows. Follow the link below to download the tool:
Usage:
- Launch the tool: Type its name
FrHedin the Windows search bar and click to open - Open a file: Inside the tool, click on
Filetab on the top left corner and open any file you want. - Edit data: Use arrow keys (or mouse) to navigate to the hex number you want to edit, and type the desire hex number. To save the change, press
Ctrl + s.
Wrong Format
PNG defines a certain format that a picture file has to follow. If a picture does not strictly follow this format, computers can not recognize it correctly, and thus fail to open it as a picture. This is what happened for this picture.
To fix it, you need to first understand the format specs of PNG. Check the PNG Format Specs page and particularly focus on the File Header section.
Now, open the lab01_broken_pic.png under the lab01 folder in your repo, and inspect
the header (the few bytes at the beginning) to see if it matches the format
specs in the Wiki page. Fix the incorrect byte.
If you successfully correct the header, the picture can be opened as a picture to view.
Wrong Size
When opening the picture, you will see extra white space below the
picture. That's because the size specified in the file is not correct,
specifically the height is too big. (You can find the size information by right clicking the file -> Properties -> Details Tab.)
Check again the PNG Format Specs to find the bytes that define the height.
Hint: After the header, comes a series of chunks, each of which conveys certain information about the image. The height is defined in the IHDR chunk, the very first chunk of the file.
Once you find the bytes that define the height, change it from 666 to 410. First, convert these two numbers to hex and then edit the bytes accordingly.
If you did that, your image file should be broken again. If it is not broken, it is just because the software ignores the error.
Fix the CRC
The reason it should break is because the software should notice we edited
(corrupted) the file so it should consider the file is not safe. The way the
computer detects this problem is to use certain bytes in the file to calculate
a validation code, called CRC (cyclic redundancy checksum). It will
compare the computed result with the checksum stored in the file. If the result
doesn't match, it knows the file is corrupted. In our case, the CRC for
the IHDR chunk is not correct given the modified height info. To find the
the CRC, pay attention to the "offset" shown at the bottom left corner of the
app: the CRC's first byte is at the offset/address 0x1D.
We need to re-calculate the CRC. Once we know which bytes we need to use to
generate the new CRC, we can simply use this website CRC calculator to calculate new CRC.
Based on the specs, we know the CRC for this chunk is calculated over the chunk
type and chunk data (Hint: from offset 0xc to 0x1c). So, type those bytes into the website and
choose CRC32 to calculate the new CRC. Then change the CRC in this chunk.
Once you have done that, you should be able to open the file correctly with the proper size.
Finishing the Lab
Submit any electronic files you create to git (from your Pi, using
git add <file>for each file, thengit commitandgit push.). (Probably you already did that for this lab)To make sure your
gitsubmission has successfully reached the server, a quick way to check is using the following command:git log --stat -1
Make sure you see your latest commit (e.g., addingtest.txt) appears in the output. Also, double-check if the first line of the log message includes origin/master in the parentheses. If not, try to git push again.(Optional) Upgrade the software on your Pi using
apt updateandapt upgrade. This will trigger download of software updates from the software mirror at Rose, and will be lots of downloads. You should save this step for OUTSIDE OF LAB so that the WiFi Access Point in the classroom does not get overloaded. Do this step at the end of lab or later this week. NOTE: only do this next step if you plan to use your pi on campus or on the Rose VPN. We want to use the CSSE update mirrors. This way you won't use your quota to install software. This is two commands: one to download the script, another to run it.pi@username-pi ~ $ wget tiny.cc/cssepi ... pi@username-pi ~ $ sudo bash cssepi ... pi@username-pi ~ $ sudo apt update pi@username-pi ~ $ sudo apt upgradeFollow the instructions (if it gives you any).
Before you power down the Pi, be sure to tell it to shut down. To shut it down, type:
sudo shutdown now...and hit enter.- Delete that huge Raspbian image file (and zip) from your laptop.
- Submit the instructor verification sheet in hard copy.