Pi Setup - Wired / Headless
The instructions assume you can connect to campus WiFi (i.e., eduroam, RHIT-open), and you have your institute laptop with an Ethernet cable. If you want to further explore the setup for a different WiFi environment, feel free to refer to the tutorial HERE.
After these steps are complete, you will no longer need the ethernet cable to connect to your Pi from your laptop, as long as your Pi remains in the same wireless network.
On the other hand, this method can be used to connect your laptop directly to Pi when internet is not accessible.
Prep the Disk
Get Raspbian
The natural operating system to install on your Raspberry Pi is a distribution of Linux called "Raspbian". This software is free, but it is large, so to save bandwidth you should download from our on-campus mirror.
On your laptop, download the Raspbian Disk Image and save it on your local machine. Since it's so big, you may want to put it somewhere that is not backed up. Download this from ON CAMPUS. It will be fast and not count against your quota. (If you must download from off-campus, you can obtain Raspbian from this website).
Install the O/S
- Extract the file you downloaded (it should contain one .img file). Do NOT double-click the file.
- Write the image onto your SD card.
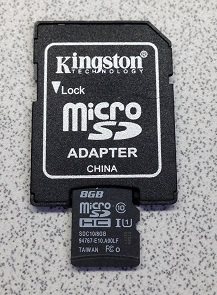
- Insert the SD card into your laptop. Be careful not to bend the SD card or adapter.
- Obtain Etcher and install it.
- Find Etcher in your start menu and launch it.
- Select the file you downloaded in step 1 (Etcher may default to the wrong home directory, you might need to hunt for it.)
- Select the SD card you've inserted.
- Click the "Flash!" button to begin writing data to the SD card.
- Wait for the write to complete. Be patient—it will likely take 10-15 minutes.
- Insert the SD card into your laptop. Be careful not to bend the SD card or adapter.
Wait for the write to complete, then remove and reinsert the SD card.
Startup configuration
Once the SD card is written, we need to make two changes so that we can connect to the Pi over the ethernet connection using SSH.
- In Windows File Explorer, navigate to the "Boot" drive (your newly-written SD card).
Enable viewing filename extensions so you can see and remove file extensions.
Enable SSH. In the Boot directory, create a new text file called
ssh(be sure there is no.txtextension)Set IP address. Find the file named
cmdline.txt, add the following text at the end of the last line.ip=192.168.137.2In my case, there is only one line in that file and it is ended with text like this
plymouth.ignore-serial-consoles. So simply append the above command after this string. (Don't forget to add a space before you type in the ip command.)
Remove the SD card from your laptop. To do this from windows, first you must "eject" it via "Safely remove hardware". Once Windows has finished with it, you can remove it.
Prepare the Network
Next, you need to set up a small local network so your computer can talk to the Pi! This section will have you (1) enable Internet Sharing and (2) disable IPv6 for easier connections to your Pi. Be sure to do all this before you turn on your Pi.
Windows 10 (Network Preparation)
(The following instructions are for windows 10. If you're using windows 7, these instructions will be a little different.)
Configure Ethernet Port with Static IP Address
Check an important parameter
Type
regeditin the windows search bar to open the application Registry EditorOn the opened Registry Editor window, from the left pane, go to HKEY_LOCAL_MACHINE\System\CurrentControlSet\Services\SharedAccess\Parameters.
Pay attention to the two IP addresses labeled in red boxes. Ideally, the two IP addresses should be identical. Remember the first three numbers of the IP addresses which will be used in later steps. In my case, it is 192.168.137
Set Static IP
Plug in your Ethernet adapter (if it is not built-in to your computer).
Open "Network Connections" by holding the windows key on your keyboard and typing the "x" key ( Win-x ) and then selecting "Network Connections". Choose "Change Adapter Options".
Right-click your "Ethernet Connection", choose "Properties", then authenticate as an administrator if prompted.
Uncheck the box next to "Internet Protocol Version 6 (TCP/IPv6)".
In the same window, select "Internet Protocol Version 4 (TCP/IPv4)" and click on the "Properties" button.
Choose the option "Using the following IP address". If your observed IP address observed in the previous step is 192.168.137.1, then set the IP here as 192.168.137.4. If your value is different, change it accordingly by setting the last number to 4.
Click "OK" to close the window and also close the "Properties" window for Ethernet.
Configure to Share your Laptop's WiFi Internet
- In the same "Network Connections" window opened above, right-click your "Wi-Fi Connection", choose "Properties", then authenticate as an administrator if prompted.
- Uncheck the box next to "Internet Protocol Version 6 (TCP/IPv6)".
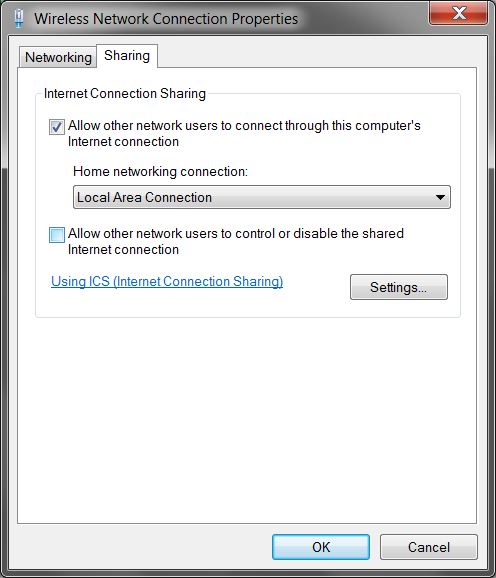
- Select the "Sharing" tab, and check the box to allow other network users to connect through your Internet connection. (If you have a choice, be sure "Ethernet Connection" is selected as the "Home networking connection".
- Click "OK" to close the window.
To disable this on Windows 10, you only have to reverse the step in the Sharing tab (uncheck the box that allows other network users to connect).
Once you've done this, skip to the next section.
Hook up the Pi!
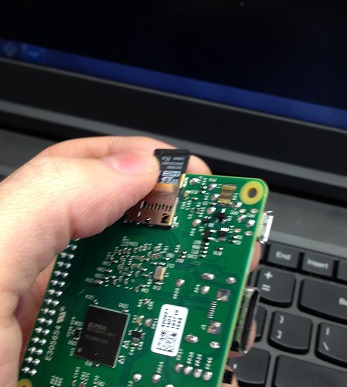
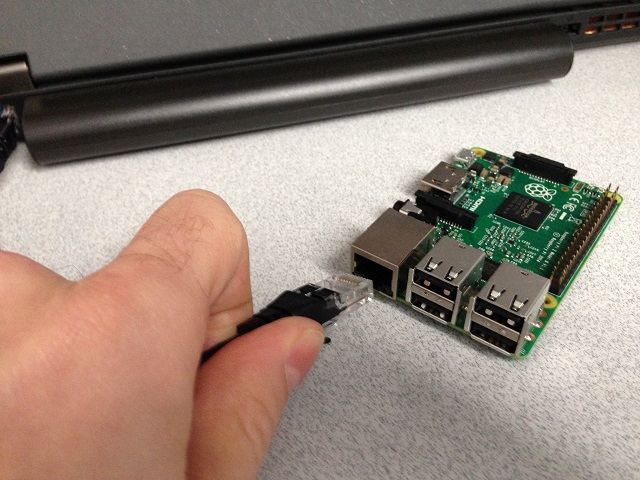
- Pull the microSD card out of the adapter, and insert it into the Pi.
->
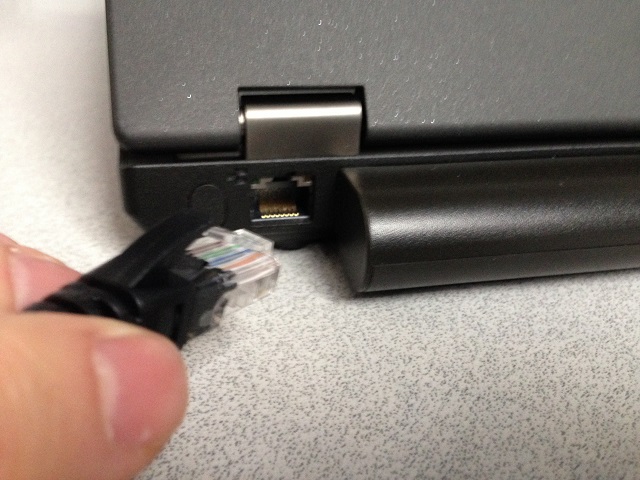
- Connect your Ethernet cable to your laptop and the Pi.
- Plug the AC adapter into a power outlet and into the Pi.
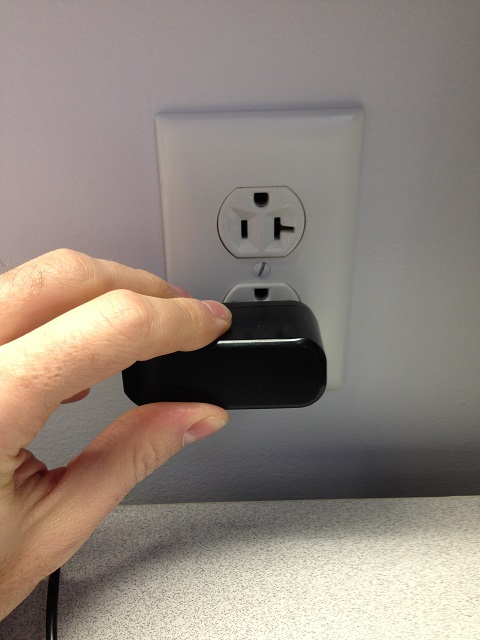 ->
-> 
- Admire the lights on the circuit board. There should be lights in two places: on the top by the SD card and on the network port. Oooh. Pretty.
- After about 30 seconds, open up Command Prompt on your computer.
Check if the Pi is alive using the command
ping 192.168.137.2. If you don't see something like the following, it's not connected. (To make it stop, type Control-C.) (You can also tryping raspberrypi.local, as shown in the image.)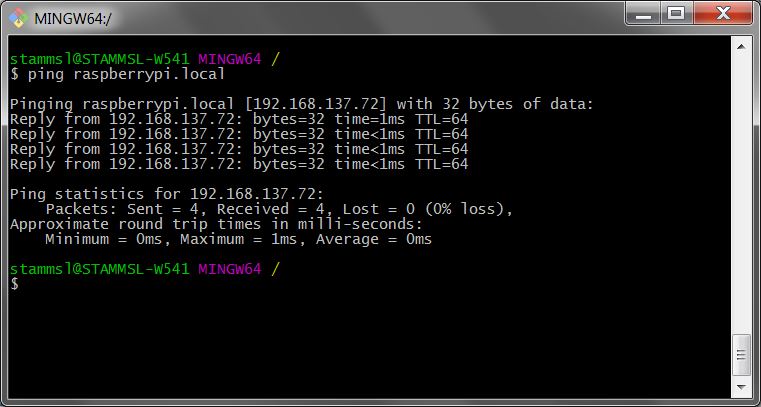
SSH to your Pi
Use the SSH protocol to connect to your pi. The username is
piand you'll use default passwordraspberry. It's connected at the address192.168.137.2, so in Git Bash, you can use the commandssh pi@192.168.137.2You may be asked to add an ECDSA signature key, if so, say yes. If the SSH command complains that the key differs from a known key (say, after re-installing Raspbian), use the command
ssh-keygen -R 192.168.137.2(with your hostname) to remove the old entry and then retry the ssh command.You should see a command prompt looking something like
> pi@192.168.137.2:~ $or possibly
> pi@raspberrypi:~ $
NOTE: if you have trouble connecting to your Pi, disconnect the power to your Pi, re-insert the SD card into your laptop, and try adding the "ssh" file again.
Set up the Pi for Wireless Access
Get MAC Address. In the terminal, type
ifconfig wlan0and hit enter, or justifconfigand look in thewlan0section. Write down the address (12 hex characters) after the wordether. This is your Pi's MAC address for the wireless (wlan0) interface.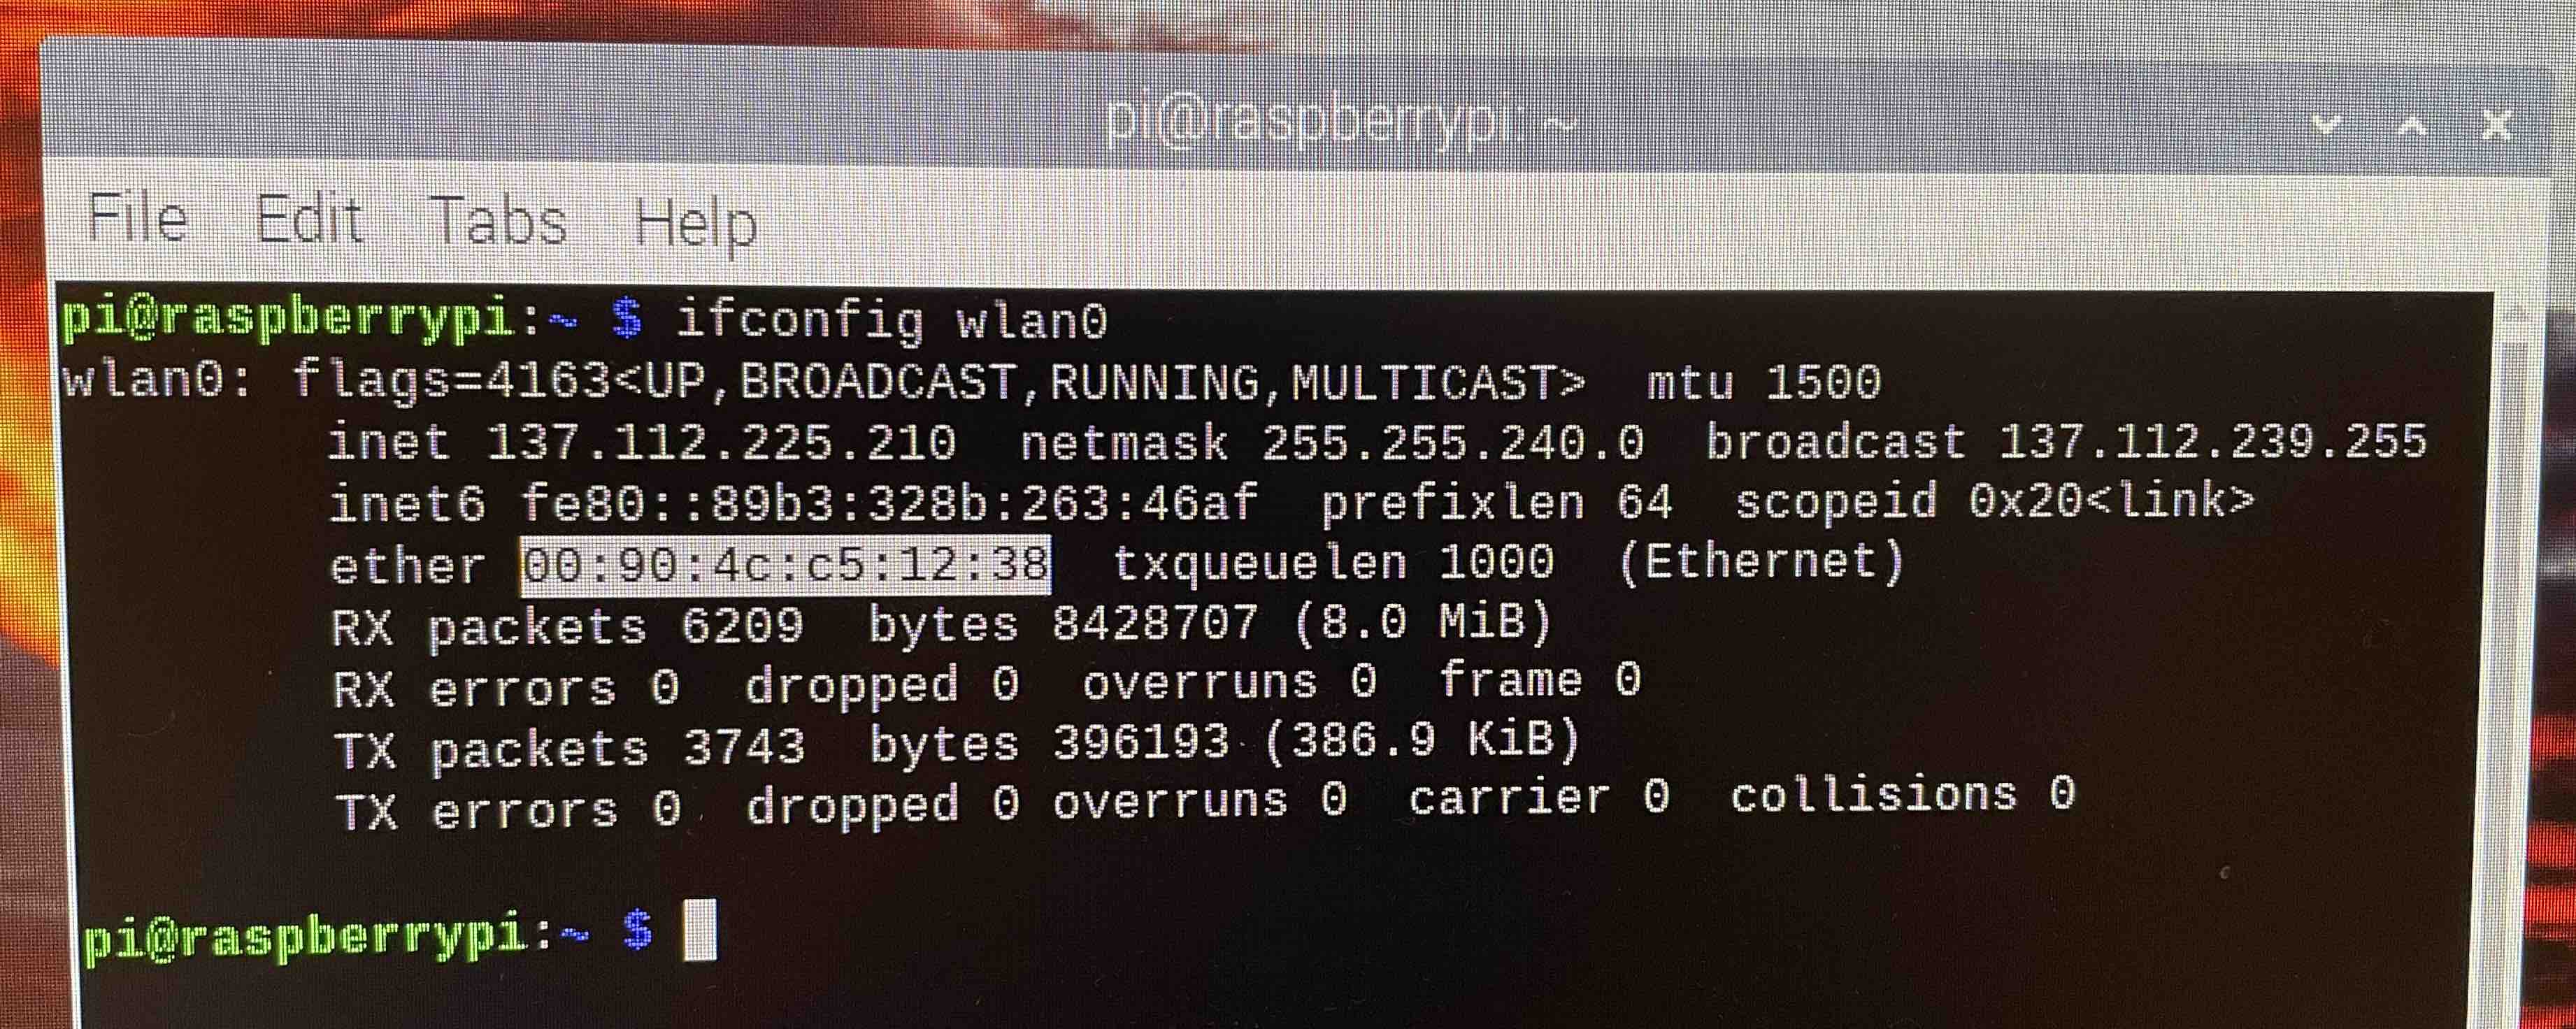
[This can also be found by runningcat /sys/class/net/wlan0/address.]Skip down to the next section, Register with EIT. Do that, then come back here. (It may take several minutes for your Pi to be registered, but you can keep going for now.)
- Back in the terminal, type
sudo raspi-configto pull up the main configuration menu. (sudomeans to run with administrator privileges. If you just tryraspi-config, it will deny access.) - Enable SSH. Use the arrow keys and enter to select
3 Interface Options, thenP2 SSH, and go through the steps to turn on SSH. - Change password. Use the arrow keys and enter to select the
1 System Options, thenS3 Password. Use this to change your password for userpi, to something somewhat secure that you will remember. Note that when you type the password, it will not display on the screen. (If you mis-type, you can always hit backspace a bunch of times, and start over.) - Change hostname. Use the arrow keys and enter to select the
1 System Options, thenS4 Hostname. Change to a name of the form<rhit username>-pi. For example, if your Rose-Hulman username is chenett1, usechenett1-pi. - Set WiFi Country. Choose
5 Localisation OptionsandL4 WLAN Country. In the menu, type "U" to quickly find "US" and select it by typing enter. - Select
<Finish>. For the settings to take hold, you must allow the Pi to reboot. Note that you will be kicked out of your SSH session.
Register with EIT
A MAC (media access control) address is a unique identifier for a network interface controller, such as found on your Pi. In order to connect your Pi to campus WiFi, you must register your Pi's MAC address with EIT.
- On your laptop, use a web browser to open https://clearpass.rose-hulman.edu/guest/guest_index.php. Log in, then select "Register New Device".
- Fill out the form: "Network Address" is 12-character MAC address. In the comment field, write a name of the form
<rhit username>-pi. For example, if your Rose-Hulman username is chenett1, usechenett1-pi. (We will set this as the pi's hostname.) - Click "Register Device".
Connect your Pi to the WiFi network
EIT will recognize your Pi on wireless, but you need to tell the Pi how to get on WiFi. We've created a script for you to use to speed this up.
You will have to open up the ssh connection over Ethernet again. (Remember that your hostname and password have changed, so if you used ssh pi@raspberrypi.local before, you now will use ssh pi@<username>-pi.local, along with the new password. If you used the IP address before, it should still work.)
On your pi, type in the following commands:
pi@username-pi ~ $ sudo apt update
...
pi@username-pi ~ $ sudo apt install ca-certificates firmware-brcm80211
...
pi@username-pi ~ $ wget tiny.cc/cssepi3-wifi
...
pi@username-pi ~ $ sudo bash cssepi3-wifi
...
The script will prompt you for which network you want. Select RHIT-OPEN unless you have a reason to use eduroam. It will ask for your RHIT username (not email) and password (even if you don't select eduroam) so it can authenticate to eduroam if you want to in the future. Follow the instructions and when it's complete, restart your pi.
Once your Pi has restarted (this may take a while), verify it is accessible via wifi.
- Disconnect the network cable from your Pi.
- Open a command prompt or Git Bash.
Using
ping, check if your Pi is connected to the wireless network. On the wireless network, your Pi's name is<hostname>.wlan.rose-hulman.edu. For example,stammsl-pi.wlan.rose-hulman.edu. Use ping to see if you can access the pi using this name:C:\> ping joeschmoe-pi.wlan.rose-hulman.edu Pinging joeschmoe-pi.wlan.rose-hulman.edu (137.112.44.132) with 32 bytes of data: Reply from 137.112.44.132: bytes=32 time=0.087 ms TTL=64 Reply from 137.112.44.132: bytes=32 time=0.063 ms TTL=64 Reply from 137.112.44.132: bytes=32 time=0.093 ms TTL=64 Reply from 137.112.44.132: bytes=32 time=0.093 ms TTL=64 Ping statistics for 137.112.44.132: Packets: Sent = 4, Received = 4, Lost = 0 (0% loss), Approximate round trip times in milli-seconds: Minimum = 0.063ms, Maximum = 1ms, Average = 0.87msIf the ping fails, your Pi is not connected to WiFi properly (or your laptop is not connected to the network).
Note: It may take a little while for EIT to finish registering your Pi's hardware address. Be a little patient with this part of the process. If you can't get on the WiFi right away, keep the Pi plugged into your laptop (using Internet Sharing) until the Pi is accessible on wifi (ping looks like above).
Connecting to Pi via WiFi: If you are able to ping your Pi with the URL above, you can log into your Pi via WiFi without Ethernet cable. Feel free to unplug the Ethernet cable between your laptop and Pi. From now on, as long as your Pi is on campus, you can (and should) use the following command to log into your Pi:
ssh pi@
<username>-pi.wlan.rose-hulman.eduReplace
<username>with your Rose username.Turn off Internet Sharing on your laptop. Sometimes Windows networking stops working and will force you to reboot your computer if you leave Internet Sharing on and put your computer to sleep.
You are now ready to proceed with the next part of the lab, Pi Control.