Lab0 Quartus tools
1 Objectives
Upon completion of this lab you should have a properly installed and functioning copy of the Quartus tools.
2 General
We use the same Quartus version and setup process as ECE233. If you still have that version of Quartus and ModelSim installed, you should be good to go.
You need to have Quartus Prime Lite Edition version 18.1.0.625 installed, not a newer version. Also, ModelSim-Starter edition.
If you think you already have these installed you can try searching the names of the two programs in the windows search bar.
3 Installing Quartus and ModelSim
Between the install files and the program itself you need to have at least 15 GB of space on your hard drive, plan accordingly.
Step 0: Before you begin the installation
Note, the version of Quartus we use only supports Windows machines. If you are on a different OS you will need to manage the install yourself - I highly encourage you to use your institute laptop. We will not help troubleshoot install issues on non-Windows machines.
You can download the install files from this link on the intel website. Ensure you are downloading the correct version of the program (18.1.0.625).
This will download a compressed 'tar' file which you will need to extract. First, move the file into a new folder on your desktop titled "Quartus_Install". Next, right click the file, hover over "7zip", and then select "extract here". This will put the install files you need into your "Quartus_Install" folder. Close 7zip if you opened it (you shouldn't have).
Step 1: Installing Quartus
-
Double click the file called 'setup.bat' in your "Quartus_Install" folder. This will open a command prompt that says "Please wait while setup starts." Wait for this to finish, it may take several minutes before it does anything. Do not do other things on your computer while you wait, no youtube, no discord, etc. Just wait. Think about a puppy for a little bit, maybe.
-
Eventually, a windows "User Account Control" popup will ask if the app can make changes to your device. Enter your credentials and say "Yes".
-
The command prompt will close, and a new install wizard with the Quartus logo will start up.
-
Press 'Next' on the welcome screen, then accept the license agreement on the next page and press 'Next'.
-
Leave the install directory as the default (it should be
C:\intelFPGA_lite\18.1), press 'Next'. -
If the next window tells you that you are installing a copy of an existing installation of edition 18.1.0.625 of Quartus, you can hit cancel and close the installer - you already have this installed. Move on to 'Step 2: Setting Up ModelSim'.
-
The next window should be the 'Select Components' screen, you will chose the right devices for this class, the settings should look like this:
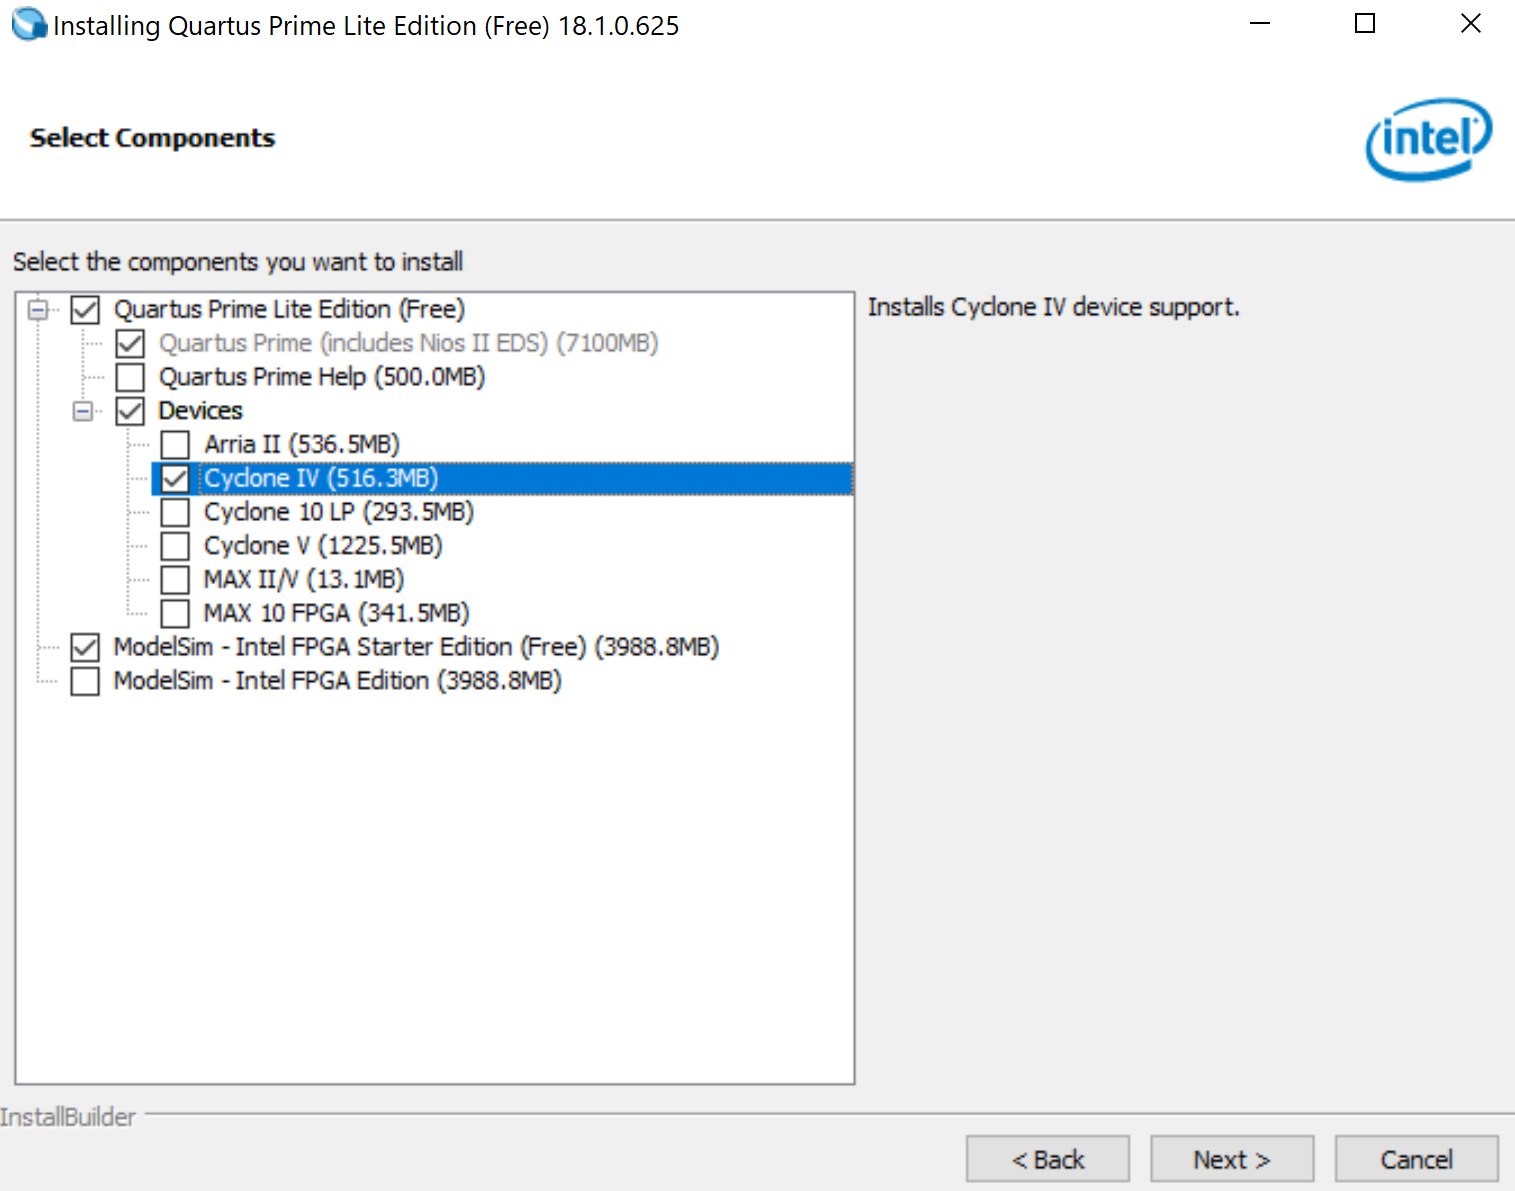
Ensure you have selected the ModelSim - Intel FPGA Starter Edition (Free) entry. Press 'Next' when all the settings are correct.
-
On the summary page press 'Next', this will initiate the actual install.
-
You may get a popup asking if you should run the "USB driver blaser" installer. Go ahead and select yes to install a few extra drivers.
-
When it is completed it will ask you if you want to launch Quartus Prime, select yes.
Step 2: Setting Up ModelSim
-
You can start Quartus from the search menu, or Desktop shortcut if you don't have it open already.
-
Go to Tools > Options
-
The top option should be "EDA Tool Options", select this category, in the right pane we need to set the path to ModelSim-Altera.
-
Select the '...' next to the ModelSim-Altera line, if you followed the install instructions above, then you should be able to navigate to
C:\intelFPGA_lite\18.1\modelsim_ase\win32aloemthen press "Select Folder".
Step 3: Setting up a new project
-
Download the test files here, extract those files to a folder of your choice. NOTE: No files for this class should ever be put on OneDrive, the paths will break Quartus and cause headaches. Keep all files in folders on your
C:\drive. -
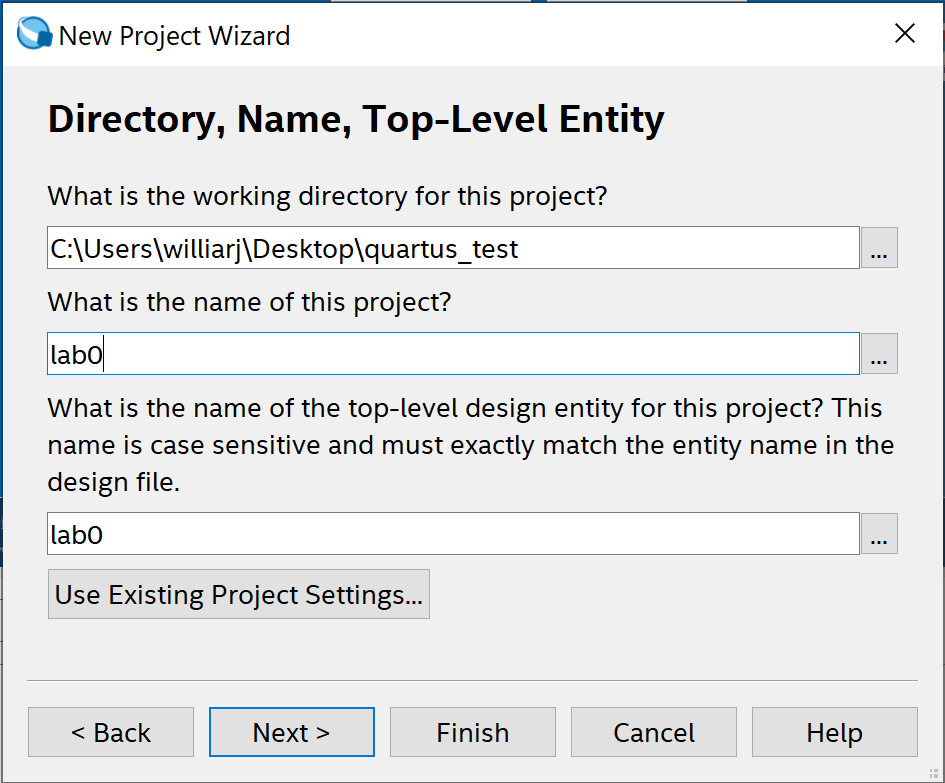
Open Quartus, and select "New Project Wizard"
-
Press "Next" on the welcome screen. Then Set up a folder name for the project, name the project and "test":
-
Press "Finish" to exit the wizard.
-
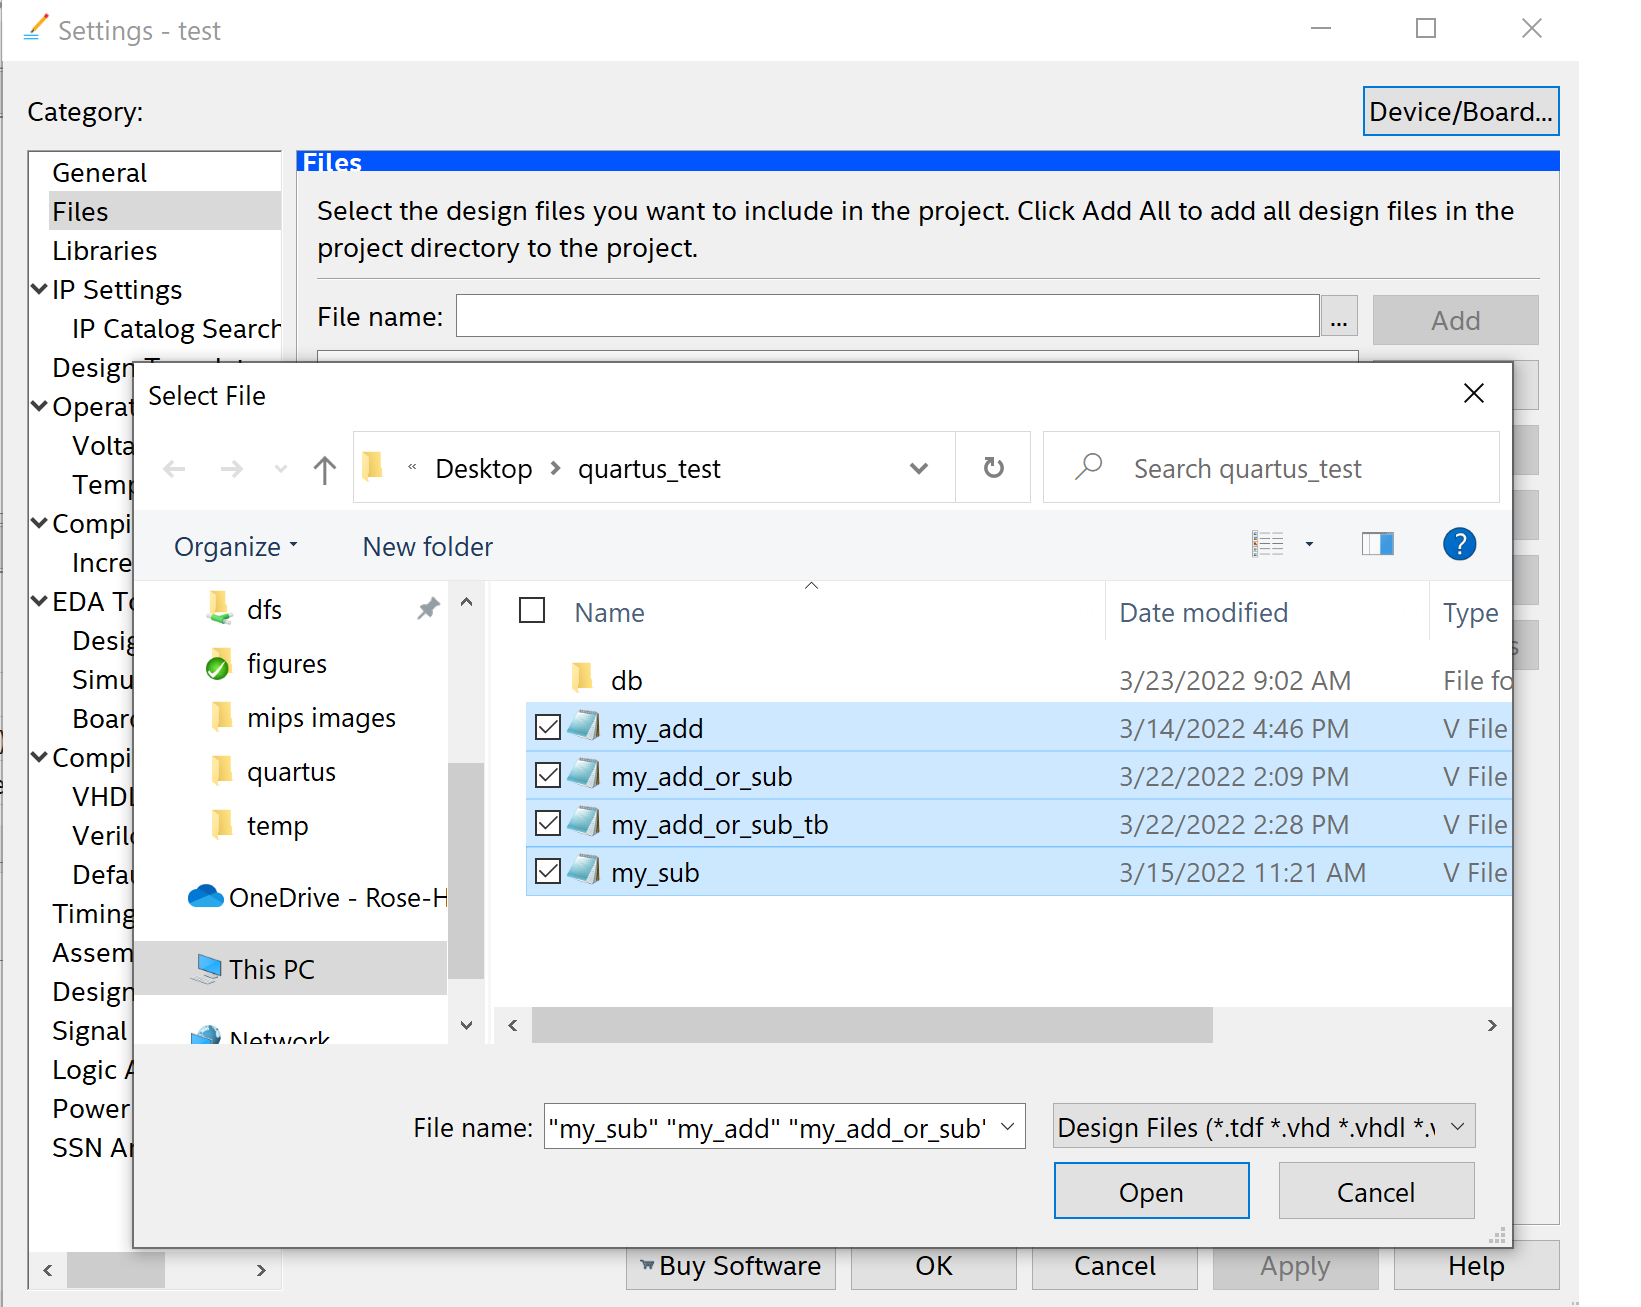
Go to Project > "Add/Remove Files in Project"
-
Press the "..." button next to "File Name", navigate to the extracted files from above, select all the .v files using ctrl+click, then press "Open":
-
On the previous screen the new files should show up, you can now press "Ok".
-
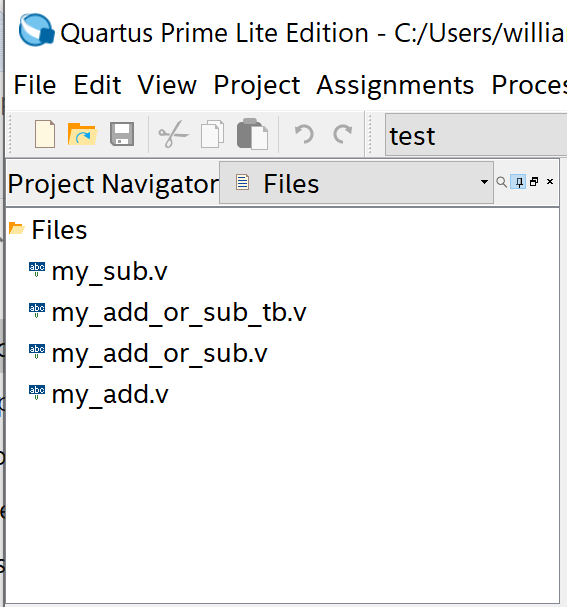
In the "Project Navigator" pane switch to "Files" view, you should now see all the files you added:
-
Right click "my_add_or_sub.v" and select "Set as Top-Level Entity".
-
Press the "Start Compilation" button, it looks like a small blue "play" button along the top of the window. This will take a few seconds to run.
-
Go to Tools > Run Simulation Tool > RTL Simulation. If RTL Simulation is greyed out, your ModelSim install is not set up correctly. See the "Step 2: Setting Up ModelSim" instructions above to correct it.
-
If you get a popup for "Select Simulation Language", set the language to "Verilog HDL" (which should be the default) and press OK.
-
ModelSim will open in a new window - it may need a moment to update. Eventually in the "Library" pane the
workdirectory will show up, wait for this to happen. -
Go to File > New > Project, and set the project name to something meaningful. The other settings should be left as default. Press OK.
-
In the "Add items to the Project" window select "Add Existing File", in the popup select "Browse".
-
In the file navigation window that opens, navigate to the folder with the .v files we added to the project earlier. You may need to navigate up several directories to find them. use ctrl+click to select all the files at once and click Open. This will add all the files to ModelSim project.
-
Close the "Add Items to Project" window. Your ModelSim should look something like this:

-
Go to Compile > Compile All. All of the blue '?'s in the "status" column by the files should change to green checks.
-
Go to Simulate > Start Simulation
-
Expand the "work" directory in the popup window. Select the
my_add_or_sub_tbmodule and press "OK". (Make sure you select the one with_tb) in its name.
- If the "my_add_or_sub_tb" file does not show up in the list, you need to restart ModelSim. Follow these steps to do so:
- Close ModelSim.
- Relaunch it from Quartus as before.
- File > Open
- Change the "Files of type:" setting to "All files".
- Select the
.mpffile, then retry the two steps above, the file should now appear.
-
In the main ModelSim window there should be an "Objects" pane listing all the inputs and outputs to the module we are simulating. Click the top one, then shift+click the bottom one to select them all.
-
Right click the selected objects and select "Add Wave".
-
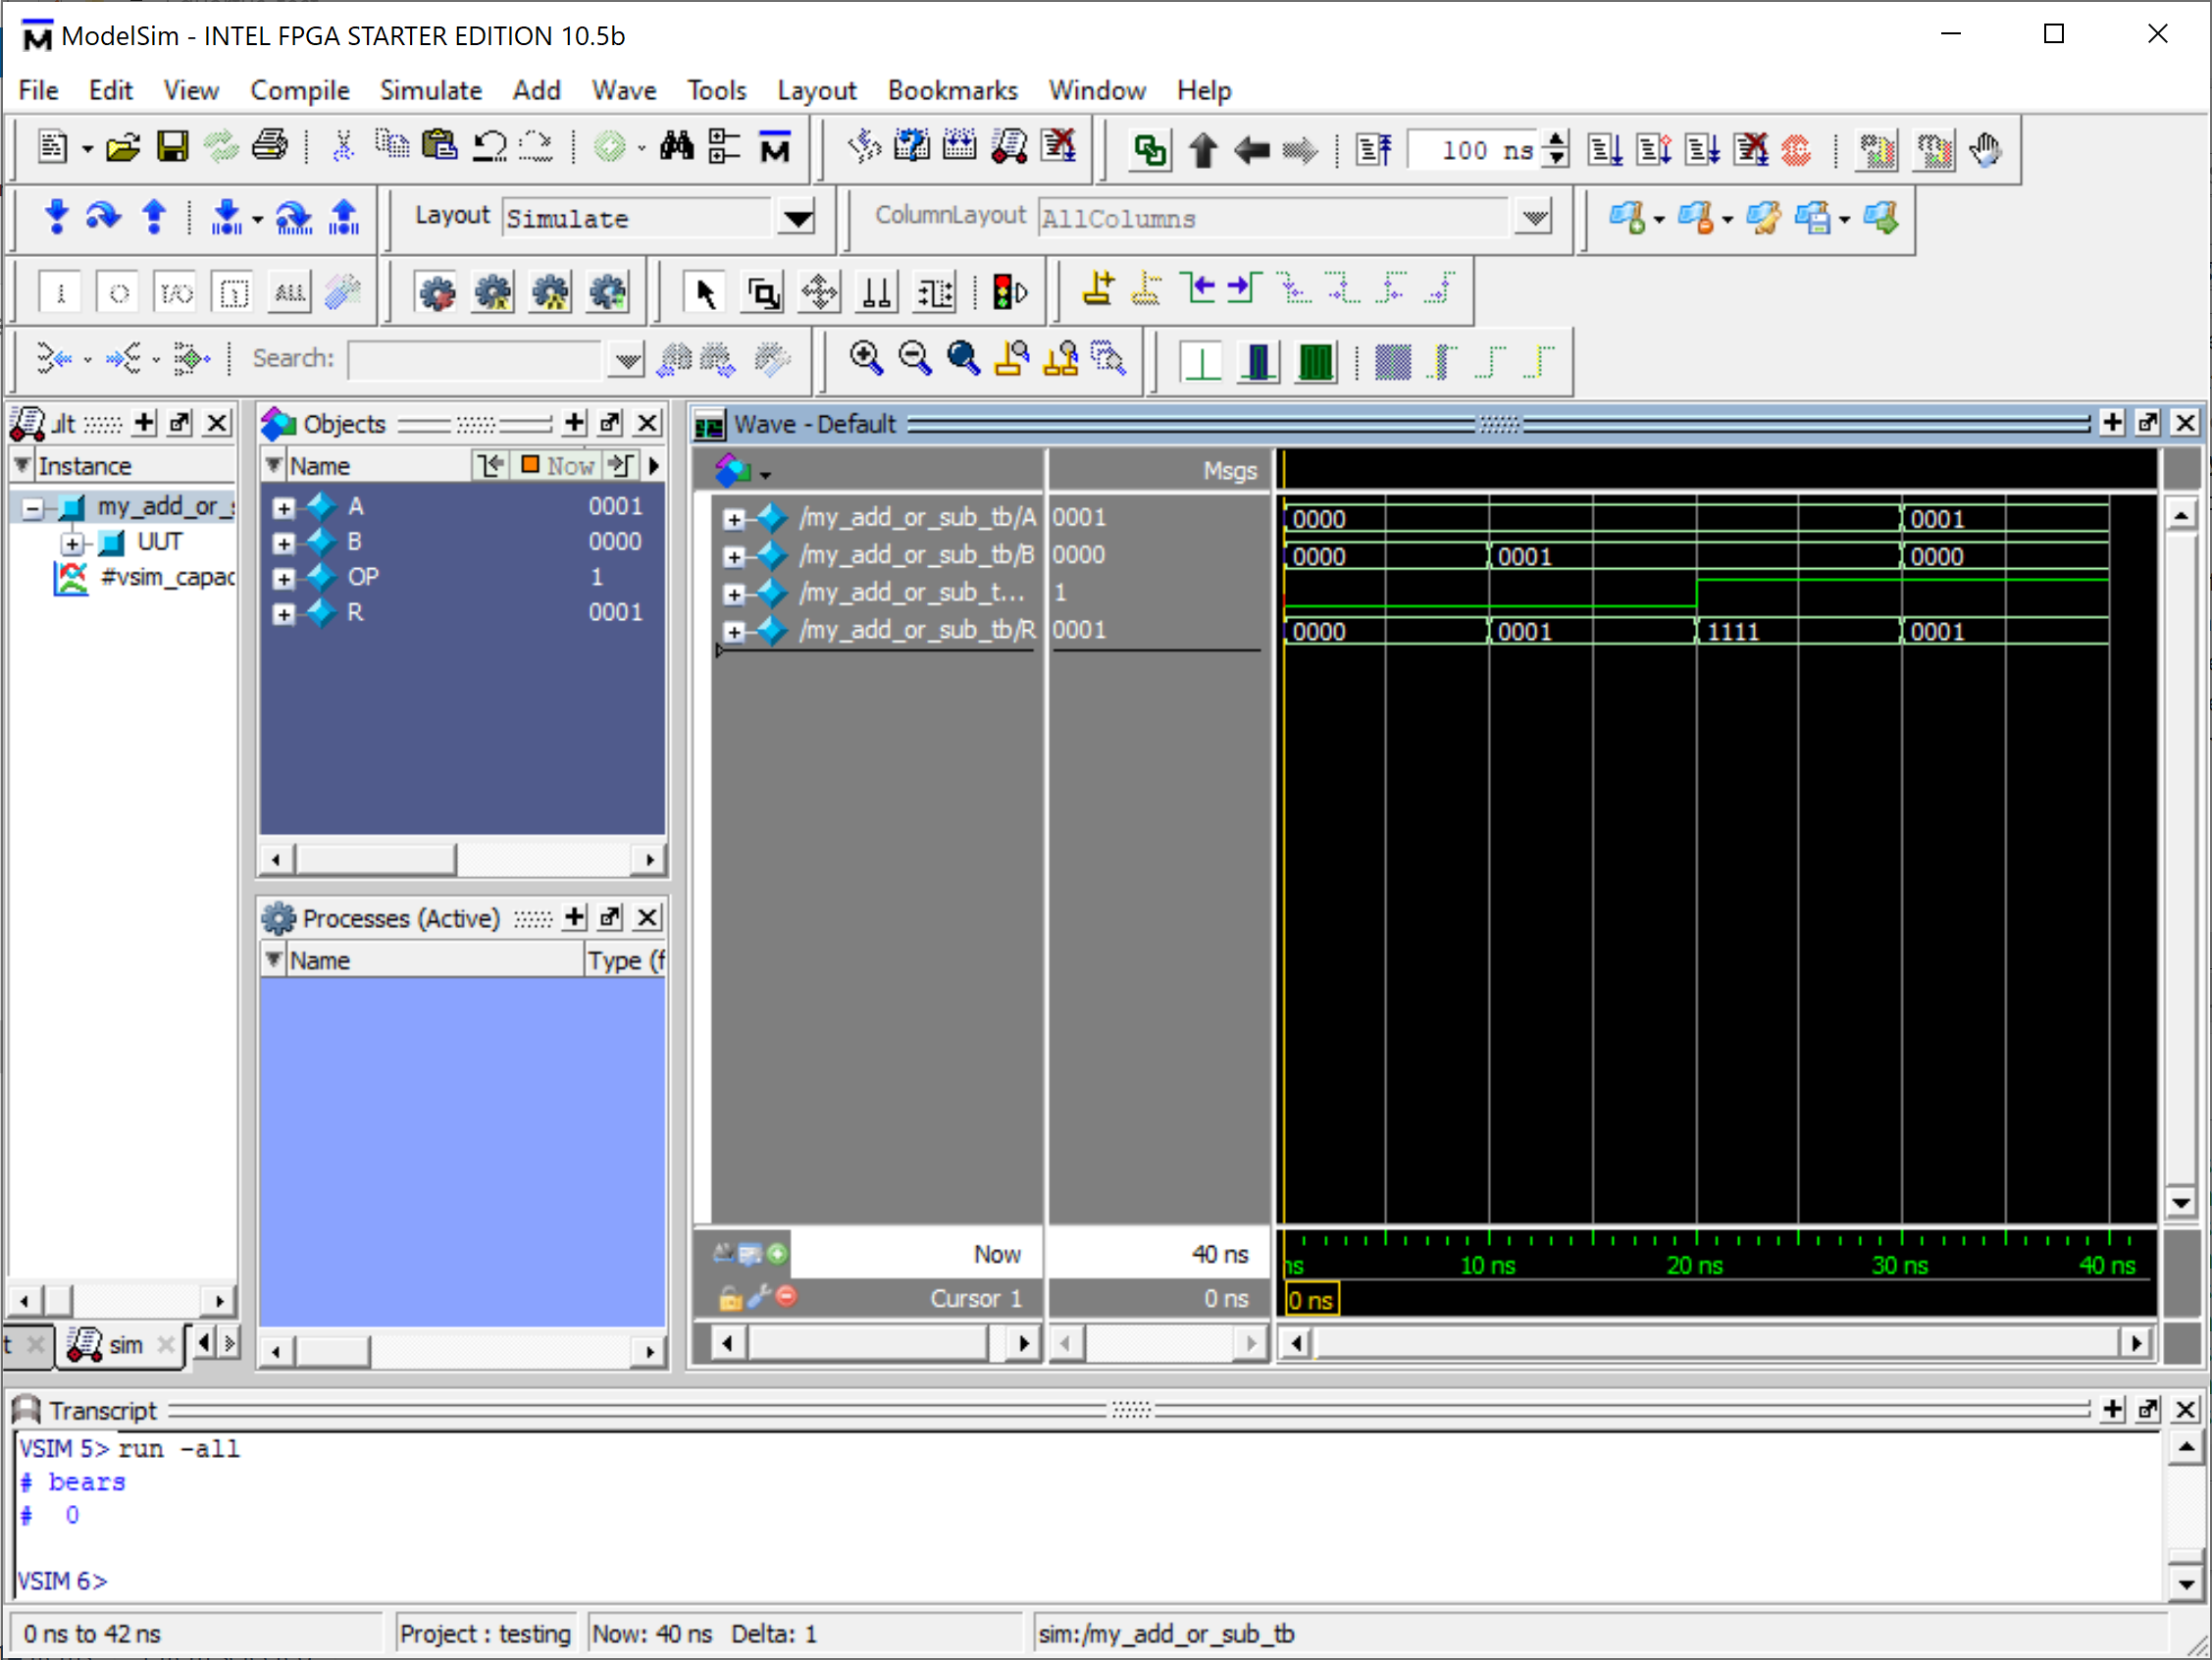
Go to Simulate > Run > Run -All.
-
The right-most pane, "Wave - Default", will update. It will be mostly black with a few green lines. Right click the darkness and select "Zoom Full". This will make the simulated time fill the entire window.
-
Your waveform should look something like the image below. If it does, then everything is good to go!
- You should use this guide as a generic reference for setting up a project, and starting a simulation, throughout the term.