CSSE 220: Object-Oriented Software Development
Faces
You will do this exercise by yourself, but be quick to ask questions of your instructor, student assistants and classmates as desired.
Goals
This exercise will let you:
Grading rubric
- Stage 1 works as specified: 5 points.
- Stage 2 works as specified: 5 points.
- Stage 3 works as specified: 10 points.
- Stage 4 works as specified: 10 points.
- Stage 5 works as specified: 10 points.
- Stage 6 works as specified: 10 points.
Total possible: 50 points.
Do this project using documented stubs throughout.
- Your score may be reduced by as much as 40% for each stage that is missing documentation.
Use good style throughout.
- Your score may be reduced by as much as 40% for each stage that uses poor style.
- Exception: it is OK to have magic numbers in your code that tests drawing Faces.
- Control-shift-F is helpful to format the file you are working on!
For any points deducted, the grader will put a CONSIDER tag saying how many points were deducted and why.
“Earn back” may be available for this assignment; ask your instructor.
- Students: “earn back” is a privilege — don't abuse it. Put forth your “good faith” effort on the project and reserve earn-back for errors that you did not anticipate.
Here is a link to the General Instructions for Grading Programs.
Overview
You will implement this project in stages, testing at each stage to see if the project works correctly through that stage.
Before beginning work, read over the titles of the seven stages below. Those titles are the iterative enhancement plan for this program and will give you a sense of what you're up against. You should also look at the figures in each stage.
Once you have an idea of what’s expected, begin working at Stage 0 and proceed through the stages in order, getting help as needed.
Don't forget to commit your changes to SVN after each stage!
Implement the project
Implement according to the following Iterative Enhancement Plan (IEP):
Stage 0. Read the specification, then design the project using a UML class diagram
Here is a specification of this project:
- A Face class allows users of the class to specify:
- The position on the screen of the center of the Face
- The diameter of the Face
- The angle at which the Face is oriented
- The colors of the Face, its outline, its eyes, and the outline of its mouth
-
A Face can draw, translate and rotate itself. It provides the following methods to encapsulate that behavior:
  /**
   * Draws the Face onto the given Graphics2D object.
   *
   * @param graphics2
   *            Graphics object onto which to draw
   */
  public void drawOn(Graphics2D graphics2) {
    // ... code elided ...
  }

  /**
   * Translates the Face by the given amount.
   *
   * @param translateX
   *            Amount to translate in the x direction
   * @param translateY
   *            Amount to translate in the y direction
   */
  public void translate(double translateX, double translateY) {
    // ... code elided ...
  }

  /**
   * Rotates the Face by the given number of degrees.
   *
   * @param degreesToRotate
   *            Number of degrees to rotate the Face (e.g. 180 to turn the
   *            Face upside down)
   */
  public void rotate(double degreesToRotate) {
    // ... code elided ...
  }
-
A FacesComponent class tests the drawing of Face objects
- A FacesViewer class constructs and displays a FacesComponent
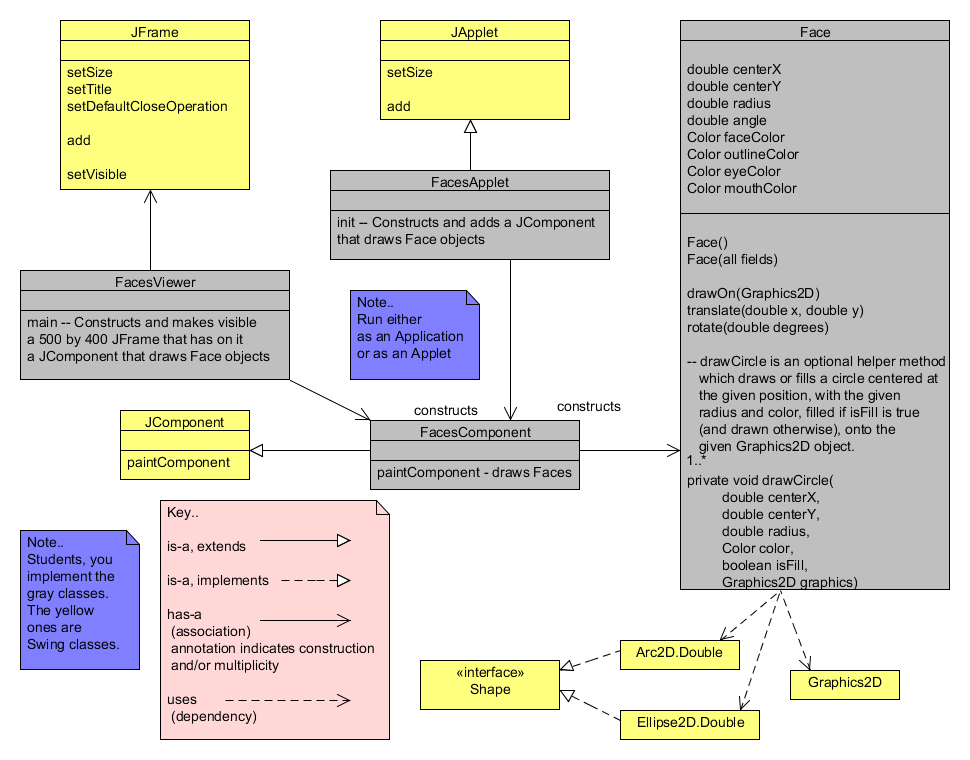
- Optionally, a FaceTest class tests the non-drawing methods of Face
Here is the UML class diagram for Faces that we developed together in class.
Stage 1. An empty 500 x 400 frame appears

- Open Eclipse.
-
From your individual repository, checkout the Java project called Faces
- Use the
SVN Repositories view to check out this project.
-
Create a new class called FacesViewer with the usual main method.
- As usual, let Eclipse type a stub for main for you.
-
Write documented stubs for FacesViewer and its main method.
- Your documentation should include words like
Constructs and makes visible a 500 by 400 JFrame that has on it a JComponent that draws Face objects.
-
Implement and test your documented stubs.
- Test by seeing if the JFrame appears with the right size and an appropriate title, and that closing the JFrame exits the application.
- Refer to Stage 1 of the IntroToJavaGraphics instructions if you need reminders for how to accomplish this stage.
-
Commit your work.
- As usual, continue to do frequent commits throughout this project.
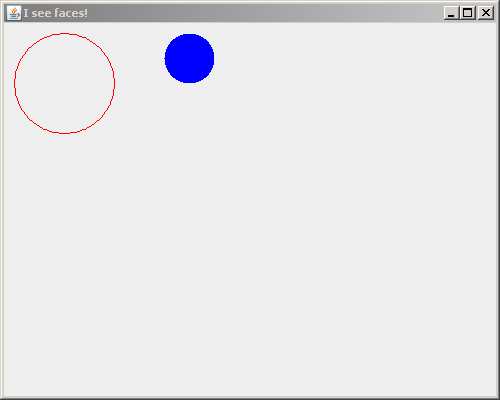
Stage 2. A circle and a filled circle appear (drawn onto a JComponent that is added to the JFrame)
Recall that you don't normally draw directly onto a JFrame. Instead, you:
- Implement a class that extends JComponent (or a special type of JComponent like JLabel, JPanel or JButton).
- Construct an instance of your class and add that instance to your JFrame.
- Override the paintComponent(Graphics) method of your class that extends JComponent, putting the drawing statements in your method that overrides paintComponent.
Proceed as follows:
- Create a class called FacesComponent that extends JComponent.
- Override the paintComponent(Graphics) method that FacesComponent inherits from JComponent.
- Write documented stubs for FacesComponent and its paintComponent method.
- Your documentation should (at this point) include words like
Displays a circle and a filled circle.
since that is all that FacesComponent should do at this stage.
- Drawing these two circles is “throw-away” code that you will write solely to test that you have set up your FacesComponent class correctly.
-
Implement FacesViewer and FacesComponent per this stage and test your documented stubs.
- So at this stage, FacesComponent should only make a circle and a filled circle appear, as in the picture.
- Your circles can be whatever size and color you like, placed wherever you like, as long as they test your FacesViewer and FacesComponent adequately.
- Refer to your code from Session 4 class (IntroToJavaGraphics) for reminders on hhow to draw circles, etc..
- After you are convinced that FacesViewer and FacesComponent are working correctly for this stage, comment-out the tests that make a circle and a filled circle appear.
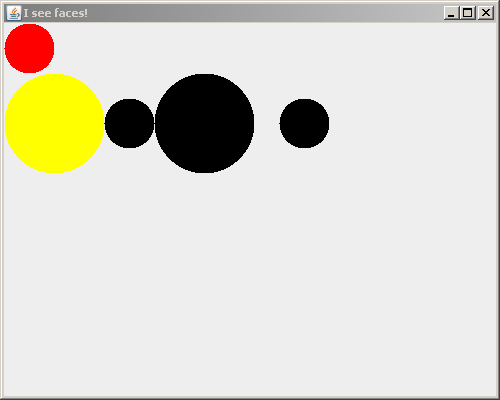
Stage 3. Filled Faces appear, but with no outline and no eyes and mouth yet
- Create a Face class.
-
Write documented stubs for Face, including (at this point) its:
- default constructor that sets the Face's position (of its center), radius and color to defaults
- constructor that sets the Face's position (of its center), radius and color to the given values
- These are the only parameters that the constructors need at this stage.
- You will implement the other parameters (e.g. eyeColor), per the UML class diagram for Faces that we developed together in class, in a subsequent stage.
- drawOn(Graphics2D) method that draws the Face on the given Graphics2D object (See the specification in Stage 0 for code you can copy to create the documented stub.)
Also modify your documented stub for FacesComponent to indicate that it (at this stage)
Displays filled faces, but with no outline and no eyes and mouth yet
since that is all that FacesComponent should do at this stage.
-
Implement Face and FacesComponent per this stage and test your documented stubs.
- So at this stage, FacesComponent should only display several Faces, but with no outline and no eyes and mouth yet, as in the picture .
- Internally, your program should use the constructors and methods listed above at this stage.
- Your Faces can be whatever size and color you like, placed wherever you like, as long as they test your FacesViewer, FacesComponent and Face classes adequately for this stage.
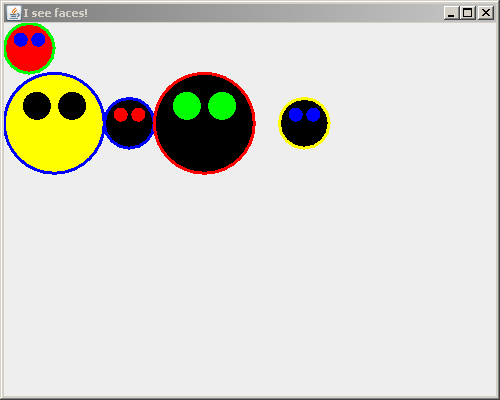
Stage 4. Filled Faces appear, with outlines and eyes, but no mouth yet
-
Augment/modify your documented stubs for Face to include (at this point):
- default constructor also sets the Face's outline color and eye color
- constructor also sets the Face's outline color and eye color to the given values
Modify your documented stub for FacesComponent to indicate that it (at this stage)
Displays filled faces with outlines and eyes, but no mouth yet
since that is all that FacesComponent should do at this stage.
- Implement Face and MyComponent per this stage and test your documented stubs.
- So at this stage, MyComponent should only display several Faces, with outlines and eyes but no mouth yet, as in the picture .
-
Get the outlines working first. That should be easy.
You might want to make the outline with a thicker-than-default line, like this:
    // Make lines 3 times their default thickness
    graphics.setStroke(new BasicStroke(3.0f));

       ... // Draw (using the thicker lines)

    // Reset line thickness to its default
    graphics.setStroke(new BasicStroke(1.0f));
-
To draw the eyes:
- Refer to the Geometry of a Face diagram (focus just on the eyes in this stage; mouth in the next stage)
-
Note that translating the Graphics2 object to the center of the Face and then rotating the Graphics2 object by -45 degrees makes it easier to draw the left eye.
- That is, after the translation and rotation, the eye is centered at (0, blah), where blah is how far out the center of the eye is from the center of the Face.
- Then rotate the Graphics2 object again, by 90 degrees this time, to do the right eye.
- Don't forget to rotate another -45 degrees after that to get back to where you were, regarding rotations.
- Don't forget to then translate by negatives of the center point of the Face to get back to where you were, regarding translations.
-
The rotate method of the Graphics2D class takes the degrees to rotate in radians:
graphics2.rotate(-eyeAngle * Math.PI / 180);
- Don't get hung up on the geometry! Get help if your eyes don't come around quickly!
- Your Faces can be whatever size and color you like, placed wherever you like, as long as they test your FacesViewer, FacesComponent and Face classes adequately for this stage.
Stage 5. Filled Faces appear with outlines, eyes and mouths

-
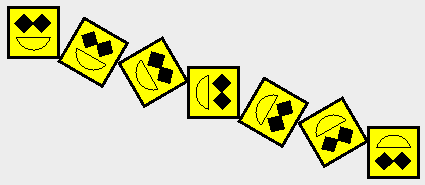
Augment your program to draw the mouths of your Faces, as in the picture.
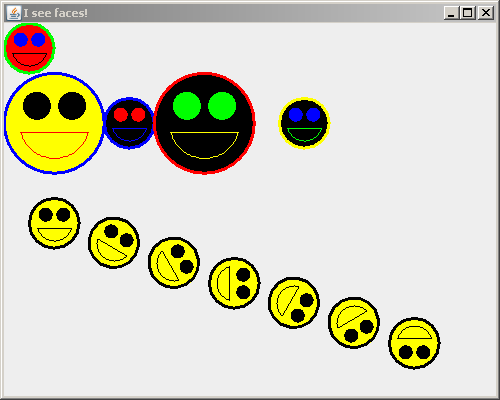
Stage 6. Faces can be rotated and be translated
-
Implement a translate(double x, double y) method that translates the Face's position by the amounts given in the arguments. (See the specification in Stage 0 for code you can copy to create the documented stub.)
- For example, in the picture, the downward slanting line of yellow Face's (which each have radius 25) have been successively translated by (55, 20).
- They have also been rotated, but wait for the next step for that.
- All that translate does is change the coordinates of the Face. You have already written the code that displays the Face at its (translated) position. Implementing this step of your iterative implementation plan is just 2 new lines of code!
- Translation is not animation; don't expect any animation here (although one could add animation, and you WILL do so in a forthcoming project).
- Test your translate method by calling it inside a loop in FacesComponent.
-
Implement a rotate(double angleToRotate) method that rotates the Face by the number of degrees given in the argument. (See the specification in Stage 0 for code you can copy to create the documented stub.)
- For example, in the picture, the downward slanting line of yellow Face's (which each have radius 25) have been successively rotated by 30 degrees.
- All that rotate does is change the field (which you must add) that stores the number of digress to rotate the Face.
- Unlike translate, you have not yet implemented rotations of the Face in your drawOn method. But this is easy to do — 2 new lines of code in drawOn are enough to rotate the Face by the value stored in its degreesToRotate field.
- Test your rotate method by calling it inside a loop in FacesComponent.
GIGANTIC HINT!!!! The face itself and each eye is currently a circle created using Ellipse2D.Double. It’s difficult to see whether you’re rotating a circle correctly! So, you may wish to temporarily change your code to draw squares instead. The constructor for Rectangle2D.Double takes the same arguments as the one for Ellipse2D.Double, so you can just switch to squares until you get rotation working. Be sure to switch back to circles before your final commit!
Stage 7 (optional). Run as an applet, then turn in your work
An Applet is Java code that can be run from a browser. As you will see, it is VERY easy to make an Application (which you have written) into an Applet.
-
Examine the FacesApplet code that we supplied. Note that it is trivial to make an Application into an Applet — just a few lines of boilerplate per the example that we supplied, plus a call to the JComponent class that your Application adds to a JFrame.
- The key is to do all the GUI work in a JComponent, because you can add a JComponent to a JFrame (as in an Application) or to a JApplet (as in an Applet).
- Select the FacesApplet class and press the Run button in Eclipse. (Or right-click on FacesApplet and select Run As ... Java Applet.) You should see your project run in the built-in Applet Viewer. It will look almost identical to the Application (just the title changes).
-
Outside of Eclipse, find the Faces.htm file in your bin subfolder of your Faces project.
- You might have to manually copy that file from the src subfolder of your Faces project, which is where we put it. It needs to end up in your bin subfolder, because that is where the executable .class files are.
Open the Faces.htm file in your bin subfolder (that is, double-click on the file), to bring it up in a browser. It should look very similar to what you just saw in the Applet Viewer.
- Examine the html code in the Faces.htm file (by opening it in WordPad, for example). Note that it is very simple to embed an applet in an html file.
Turn-In Instructions
Commit your project to your individual repository when you are done.
- Make sure that you have no compiler warnings left.
- Magic numbers in your
FacesComponent class are OK, but you should otherwise use good style. So, consider doing a Control-shift-F on each of your files before your final commit.