How to Install: Subclipse
Rose-Hulman Institute of Technology –
Computer Science & Software Engineering
Overview
Subclipse is a plug-in for Eclipse that makes it extremely easy to share source code with your team, right within Eclipse. This document contains instructions on how to install Subclipse.
Make sure that
TortoiseSVN is installed before you attempt to install Subclipse
Installing Subclipse on Eclipse 3.7 (on freshman laptops, you can probably
skip to Using Subclipse)
These directions are just modified version of those posted at http://subclipse.tigris.org/install.html. The modifications include using a local copy of the files for Eclipse 3.2.2 and higher so the installation does not count against bandwidth quotas. If you have problems with the installation or need Subclipse for an older version of Eclipse, you may wish to refer to the original installation site.
-
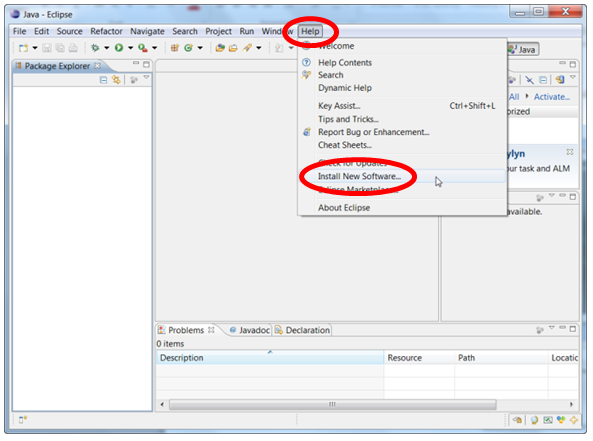
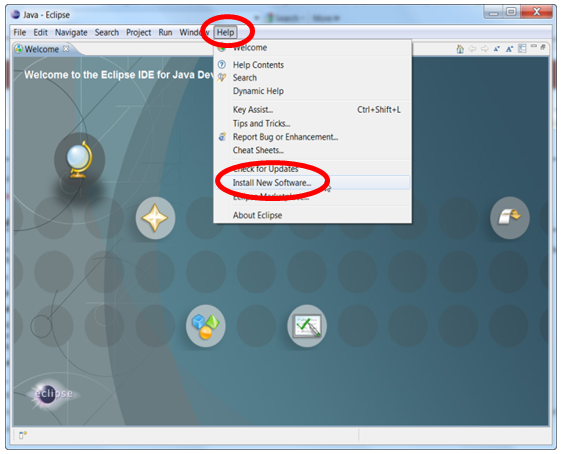
Open Eclipse.
-
Choose Help → Install New Software... (Screenshots for
navigating from both the workbench and the welcome screen)
-
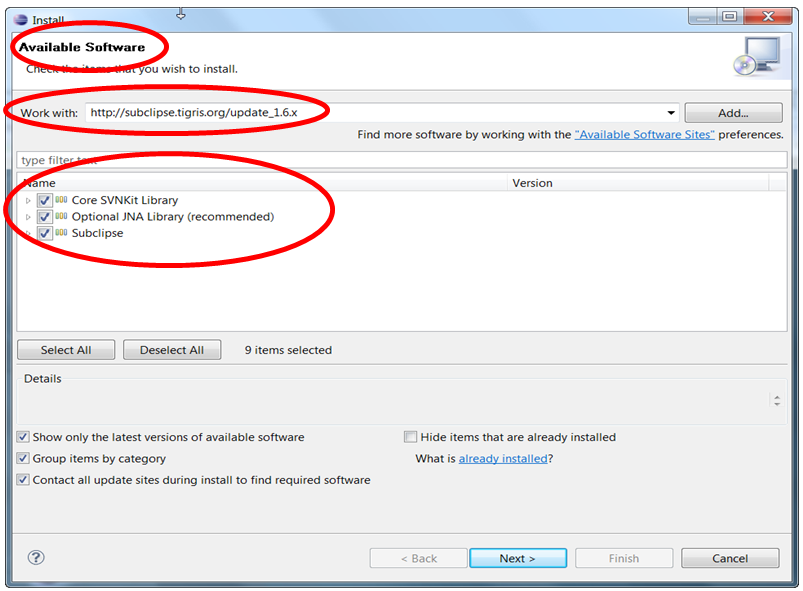
In the Available Software dialog that opens, carefully type
http://subclipse.tigris.org/update_1.8.x
in the Work with:
field and press Enter. Case matters, and NO spaces! After several seconds, three checkboxes will appear. Check all three.
-
Press Next and OK to continue installing Subclipse. Accept licenses and
trust certificates if needed, and ignore any security warnings. The
Installing Software dialog may take several minutes and be slow to
start.
-
When asked to do so, restart Eclipse. You may see a Subclipse Usage
dialog box appear; if so, uncheck the box and continue.
(Checking for and installing future updates proceeds in much the same way.)
Using Subclipse
These instructions are aimed at CSSE120 students, but others should be able to follow similar steps and figure it out pretty easily.
-
You should have received a Subversion (SVN) password (in an
email from "root"). You will need this password below to connect to the server.
-
Open Eclipse.
- Choose Window → Show View → Other..., expand SVN, select "SVN Repositories",
and click OK. This causes SVN Repositories tab to appear at the bottom of
the Eclipse window, near the console tab.
- Open the SVN Repositories tab if needed, right-click, and choose New → Repository Location...
- In the "Add SVN Repository" window, type:
http://svn.csse.rose-hulman.edu/repos/csse120-xxxxyy-username
, where:
- xxxx = the year in which this academic
year ends.
- yy = 10 (Fall), 20 (Winter), or 30
(Spring). Thus, 201230 is Spring 2011-2012.
- username is your
Rose-Hulman username.
- For example, for Spring 2011-2012, John X. Smith would enter
http://svn.csse.rose-hulman.edu/repos/csse120-201230-smithjx
- In the next dialog box, enter your Rose-Hulman username and the
Subversion password from step 1,
and check the box to remember your password.
(This isn't your network password you use for Outlook.)
- If it prompts you again for username and password, then one of three
things is incorrect:
- Your password
- The repository URL from step 5. Even a subtle error such as a
blank space before the repository name could mess it up.
- It's possible your instructor made a mistake when setting up your
account.
If you get stuck here, no problem, just ask for help from your instructor
or a teacher's assistant.
- The repository you entered will appear in the left window. Expand it.
- Right-click the FirstSVNProject project, and choose Check Out.
Confirm all of the options presented.
- In the Package Explorer on the left, FirstSVNProject should appear. Expand it, find
spam.py inside your FirstSVNProject project and follow the instructions in the comments at the start of that file.