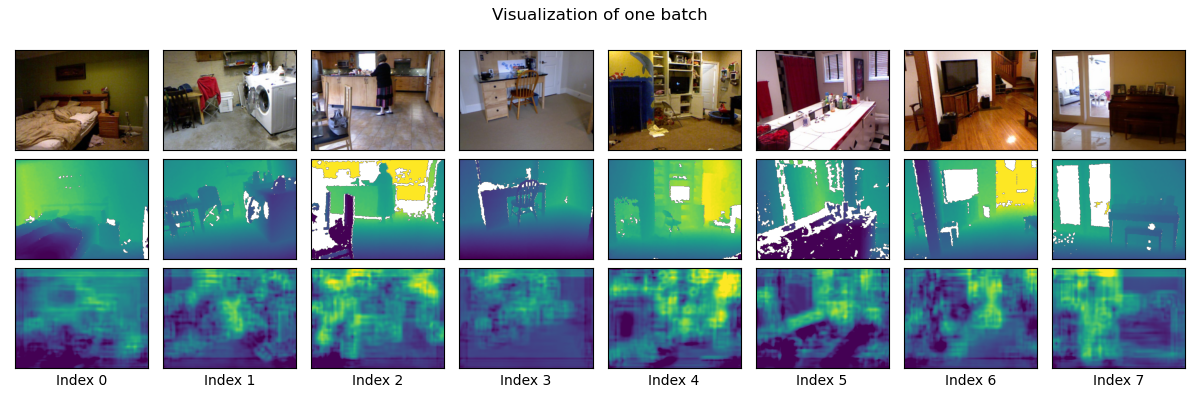
Figure 1: Depth predictions on eight random images from the NYU-Depth V2 dataset. Row 1 is the input images. Row 2 shows ground truth depths. Row 3 is the predicted depths, using a very simple convolutional model trained for a mere 40 epochs. Hopefully your predictions look better than these.
Instructor: Kyle Wilson
An image is a 2D representation of a 3D world. The process of taking a photo is lossy. The rich 3D geometry is compressed down into a flat image plane. Information is lost. In general, it’s impossible to reason our way back to a 3D model of the scene from a single image.
In this project we will cheat, and attempt this impossible problem using machine learning. We’ll train a deep learning model to predict the depths of pixels in an image based on statistical patterns in lots of training data.
This is a group project. We’ll be using specialized hardware (GPUs) for training the models, and groups will help make sure there is enough compute to go around.
Students come to this class with hugely varying levels of experience with machine learning. I want the assignment to adapt to your pre-existing knowledge. So, for each of the tasks below there is a hint link. There’s no grade penalty for using them. Essentially, you get to pick your difficulty level.
By doing this project, you will learn to:
Start by reading the GPU server documentation. Make sure that you can connect to the compute server, clone the bare-bones starting code, and run simple Python commands.
I recommend completing these in order:
NYU Depth v2 is a high-quality dataset commonly used for depth prediction. You can read the official documentation here. Unfortunately, the official download link for this dataset is down, and I couldn’t find any reputable mirrors. While we wait for that to get fixed, we’ll use a version of the dataset that was uploaded to HuggingFace by user tanganke.
Here are subgoals for this task:
torch.utils.data.DataLoader object for each splitWork through these in order, using the framework provided in the starting code.
Remember, there’s a hint available if you’d like. You’re encouraged to use this, especially if you are newer to doing machine learning.
Next you’ll need to define a neural network to train. Let’s start with the basics. You’re welcome to try fancier models later (see the “extensions” section below).
The recommended starting point is a model with two parts:
This model is a starting point, and its performance is fairly bad. I’d like you to get something training first, even if it is bad, before you try to improve the model.
It’s not important that you reproduce this model exactly.
Remember, there’s a hint if you’d like to use it.
Every machine learning project needs at least one loss function. Its job is to quantify error: how different is your model’s prediction from the correct answer?
Follow the instructions in the starting code to write your loss function.
There is a small hint for this section too.
This section isn’t mainly about writing code. I’ve provided a training loop. If your DataLoaders, your Model, and your LossFunction are all working, then you can run these cells to train your model.
Here’s how you know if it is working:
I often see a problem where the model outputs all zeroes after only a little training. If you see this, remove the final ReLU in your decoder and try again.
The first time you train your model the results will probably be bad. Now it’s time to tweak things. I’ll give suggestions on reasonable things you can try that tend to improve models.
Easy things to try that might help a little:
Harder things to try that might help a lot:
1/depth instead of depth. (This tends to be more numerically stable.) I ended up editing my dataloader to invert the depth images when I loaded the dataset.nn.Dropout layers to your model and retraining (this may artificially inflate your Train Loss so don’t worry if it becomes quite a bit higher than the Validation Loss. It’s still bad if the Train Loss is way lower than Validation Loss.)The picture at the top of this lab sets a low minimum bar. If your predictions look worse than these, keep working. If yours look about the same or better you’ve passed the minimum bar for this assignment.
(See grading guidelines below. All of these are optional, but earning a higher grade is tied to completing some of them.)
The first thing due is your check-in artifact. You’ll need to upload sample output from your network to Moodle. (I’m looking for an image similar the one at the top of this document, but generated by your code.) To meet this milestone your code must be able to load data, do some minimal amount of training, and generate output that is better than random noise. (The quality bar is very low for the check-in.)
Successfully completing all of the core tasks well will earn a C on this assignment. To earn a B, also complete one extension task of your choice. To get an A, complete two extensions and produce output that is a clear improvement on the sample output at the top of this page.
Per the syllabus, grading will be on the basis of correctness, clarity, and efficiency.