CSSE 461 - Computer Vision
“Structure from Motion” is the problem of reconstructing the geometry of a 3D scene given many 2D images. As we’ll cover in class, this is a hard math problem, and solving it is an area of active research.
Most SfM solvers are written for researchers, by researchers. The closest thing we have to an end-user codebase is COLMAP. It clocks in at roughly 100,000 lines of code! So we won’t be writing our own SfM solvers in class.
You’ll be creating a report as you go. At the end of the lab, upload your report to Gradescope.
You may work solo or in pairs, as you choose.
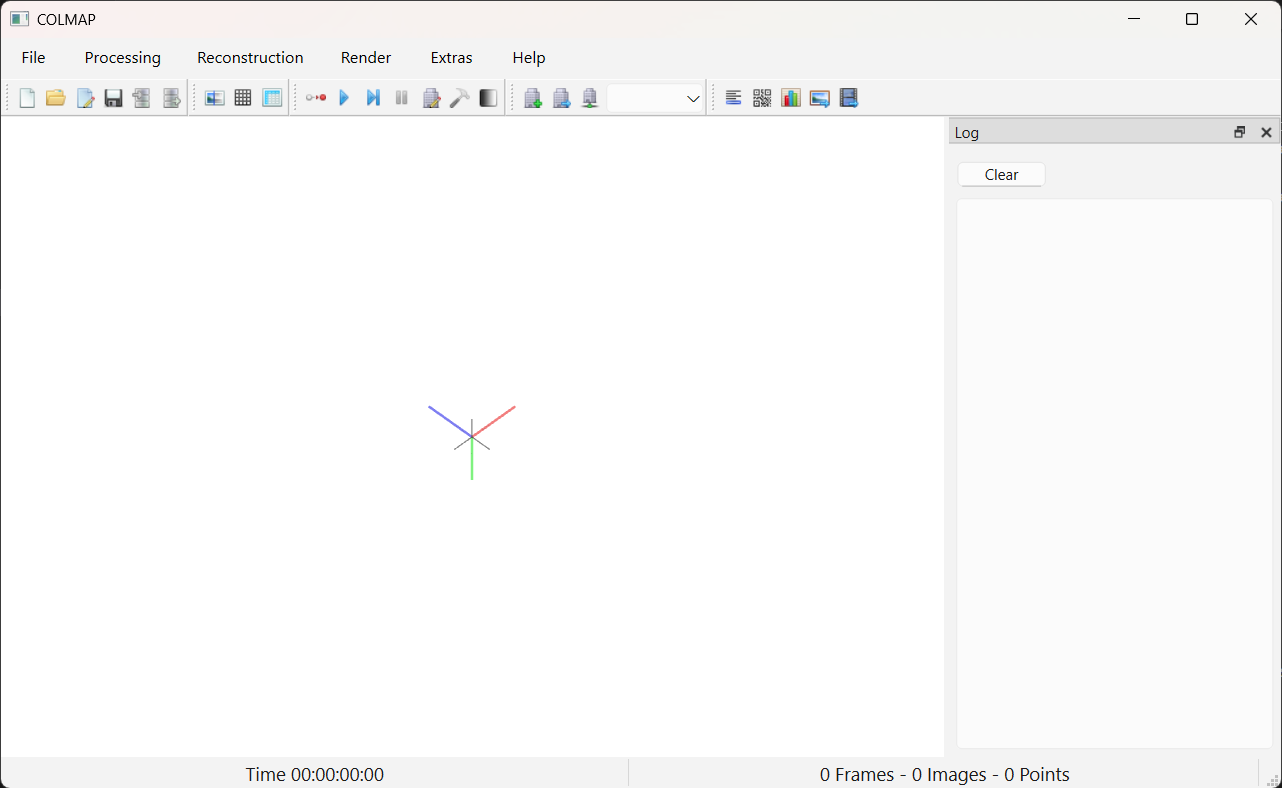
COLMAP.bat.If everything worked, you should see something like this:
If you aren’t completing this lab on a Windows computer, read
COLMAP’s install
docs. Look first for a way to install a pre-built binary. (For
example, Mac OS users can do brew install colmap, and some
Linux users will have packages available.) If none of those apply, read
further down the page for instructions on building the software from
source. Please reach out to me if you hit snags.
This GitHub page has a nice list of standard datasets used in computer vision. The first category is “SfM and MVS”. These datasets are suitable for us (although some will be too large to solve in a reasonable amount of time).
Grab the “Small object dataset” called Bunny, hosted by
the vision lab at TUM. Download the .tar.gz file. In
Windows, right-click to “Extract all”.
Go back to COLMAP. We’ll run SfM in a series of steps:
File -> New Project.Downloads/bunny_sfm.db.) Click
“Save”.Downloads/bunny_data/bunny_data/images.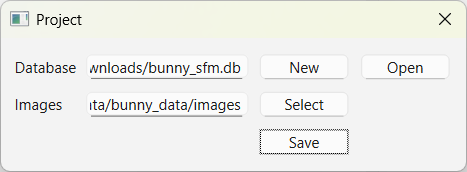
Next we’ll run algorithms that identify keypoints in the images. Click “Processing -> Feature Extraction”. Most of these options are fine at their default values. Note a few that are relevant:
PINHOLE is the model we covered in classSIMPLE_PINHOLE is the same, but with a square pixel
constraintSIMPLE_RADIAL is like SIMPLE_PINHOLE, but
with a radial distortion correction factor. This is a nice accommodation
to the real world, and will probably give you better results.Let’s choose SIMPLE_RADIAL and
Shared for all images.
Click “Extract” and wait a moment. When it finishes computing you can close the Feature Extraction window. COLMAP has finished running SIFT, a top-notch feature extractor. The extracted locations were written to the db we created. You can see these detected keypoints by clicking “Processing -> Database Management”, selecting an image, and click the “Show Image” button.
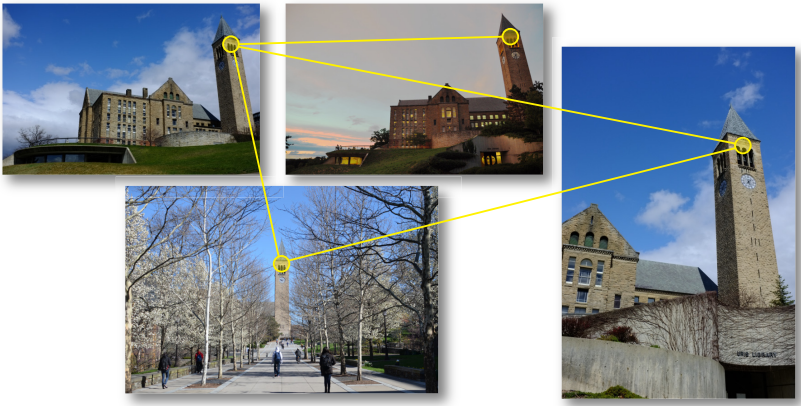
The next step of processing is to match keypoints across different views. We call a set of keypoints that all refer to the same 3D point a “track”. Here’s a conceptual view of what we’re trying to compute next: we’ve matched the same 3D point across multiple views. We know the pixel locations of this one point as it appears in each image.
Click “Processing -> Feature matching”.
The tabs across the top of this window are different algorithms for choosing which images to try to match. Out dataset is small, so stick with the first tab (“Exhaustive”) and click “Run”.
You can see what happened by clicking “Processing -> Database Management”. Select an image, and click “Overlapping images”. Now select one overlapping image from the list and click “Show Matches”.
Click “Reconstruction -> Start Reconstruction”. Let it run. Look at the stats in the bottom bar of the COLMAP window, the log messages to the side (and also in the terminal that opened when you launched COLMAP), and the 3D visualization.
Look under “Render -> Render options” for ways to tweak the 3D view. I found “Image connections” interesting: it shows which cameras were able to match some scene content with each other.
Add the following to your report:
Click on “File -> Export model as text”. This will write a bunch
of .txt files, so consider making a folder for them. Open
frames.txt in a text editor. This file contains the
computed extrinsics for each image in the reconstruction.
Find the first line of data. I want you to compute the 3D coordinates of the center of projection of this camera. Add this computation to your report. Show your work. You’ll probably write a few lines of code. Show those in the report too.
COLMAP stores 3D rotations as quarternions. Fortunately, we can convert these to rotation matrices easily:
from scipy.spatial.transform import Rotation as R
quat = [w, x, y, z]   # your numbers here
rotmat = R.from_quat(quat, scalar_first=True).as_matrix()
print(rotmat) # 3x3 rotation matrixRecall the equation that defined \(\mathbf{R}\) and \(\mathbf{t}\):
\[ X_c = \mathbf{R} X_w + t \]
The camera’s center of projection is the point where \(X_c = \mathbf{0}\). So to find the camera’s position in world coordinates, set \(X_c\) to zero and solve for \(X_w\). (Hint: rotation matrices are special: \(\mathbf{R}^{-1} = \mathbf{R}^\top\).)
For part four, create your own dataset, run SfM, and inspect the reconstruction. Include these in your report:
I’ll offer a small amount of extra credit if you can collect a dataset where the reconstruction fails in an interesting way. I’ll be stingy on this–it needs to really be interesting! Of course you’ll fail to reconstruct a scene where cameras can’t see any context in common, or where everything looks like a plain white wall.
Upload your report (with answers for Parts 2, 3, and 4 of this lab) as a pdf to Gradescope. If you worked in a pair, use the Team feature on the Gradescope assignment to upload a single report for your team.