CSSE 220: Object-Oriented Software Development
Scenes
You will do this exercise by yourself, but be quick to ask questions of your instructor, student assistants and classmates as desired.
Goals
This exercise will let you:
Combine and apply concepts that you have practiced in previous exercise, especially how to:
- Implement a class
- Fields, constructors, methods.
- Constructing objects by using the new keyword
- Referencing instance fields and methods by using the this keyword
- Create a basic GUI (Graphics User Interface) and draw on it.
- The JFrame and JComponent classes; the add method of the former and the paintComponent method of the latter.
- Investigate and apply an API (Application Programming Interface). In particular, the use of these classes:
- JFrame and JComponent
- Graphics2D
- Rectangle.Double
- Ellipse2D.Double and Arc2D.Double
- Color
- See how a project can easily be implemented as both an Application and as an Applet
Grading rubric
- Stage 1 works as specified: 5 points.
- Stage 2 works as specified: 5 points.
- Stage 3 works as specified: 10 points.
- Stage 4 works as specified: 10 points.
- Stage 5 works as specified: 10 points.
- Stage 6 works as specified: 10 points.
Total possible: 50 points.
Do this project using documented stubs throughout.
- Your score may be reduced by as much as 40% for each stage that is missing documentation.
Use good style throughout.
- Your score may be reduced by as much as 40% for each stage that uses poor style.
- Exception: it is OK to have magic numbers in your code that tests drawing Faces.
- Control-shift-F is helpful to format the file you are working on!
For any points deducted, the grader will put a CONSIDER tag saying how many points were deducted and why.
Here is a link to the General Instructions for Grading Programs.
Overview
You will implement this project in stages, testing at each stage to see if the project works correctly through that stage.
Before beginning work, read over the titles of the seven stages below. Those titles are the iterative enhancement plan for this program and will give you a sense of what you're up against. You should also look at the figures in each stage.
Once you have an idea of what’s expected, begin working at Stage 0 and proceed through the stages in order, getting help as needed.
Don't forget to commit your changes to SVN after each stage!
Implement the project
Implement according to the following Iterative Enhancement Plan (IEP):
Stage 0. Read the specification for the Face section of the project.
Here is a specification for this portion of the project:
- A Face class allows users of the class to specify:
- The position on the screen of the center of the Face
- The diameter of the Face
- The colors of:
- The Face
- The outline of the face
- The eyes
- The outline of the mouth
-
A Face can draw itself. It provides the following method to encapsulate that behavior:
  /**
   * Draws the Face onto the given Graphics2D object.
   *
   * @param graphics2
   *            Graphics object onto which to draw
   */
  public void drawOn(Graphics2D graphics2) {
    // ... code elided ...
  }
-
A FacesComponent class tests the drawing of Face objects
- A FacesViewer class constructs and displays a FacesComponent
- There's a FaceTest class to test the Face class you've implemented.
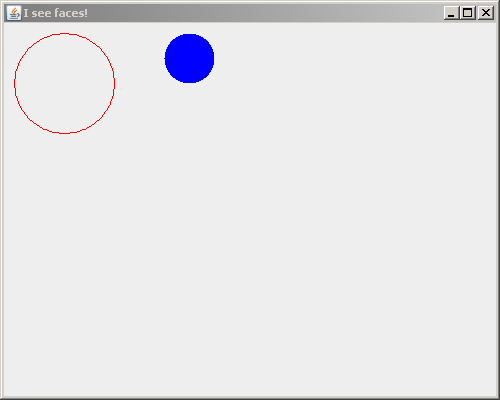
Stage 1. A FacesViewer Test
- Open Eclipse.
-
From your individual repository, checkout the Java project called Scene
-
You have been given the Face, FacesViewer and FacesComponent classes.
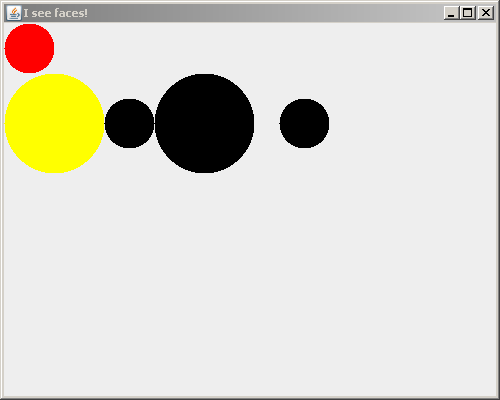
Stage 2. Filled Faces appear, but with no outline and no eyes and mouth yet
- Create a Face class.
-
Write documented stubs for Face, including (at this point) its:
- default constructor that sets the Face's position (of its center), radius and color to defaults
The defaults are:
- center x - 50
- center y - 100
- radius - 50
- face color - Color.yellow
- The following items are for later stages:
- face outline color - Color.blue
- eye color - Color.black
- mouth color - Color.red
- constructor that sets the Face's position (of its center), radius and color to the given values
- These are the only parameters that the constructors need at this stage.
- You will implement the other parameters (e.g. eyeColor) in a subsequent stage.
since that is all that FacesComponent should do at this stage.
-
Implement Face per this stage and test your documented stubs.
-
In FacesComponent, comment out the call to testDrawing and comment in the call to testFaceDrawingStage2. This will add the test cases for the Faces instead of the circles (the circles were only there to make sure everything checked out correctly).
- So at this stage, FacesComponent should only display several Faces, but with no outline and no eyes and mouth yet, as in the picture .
- Internally, your program should use the constructors and methods listed above at this stage.
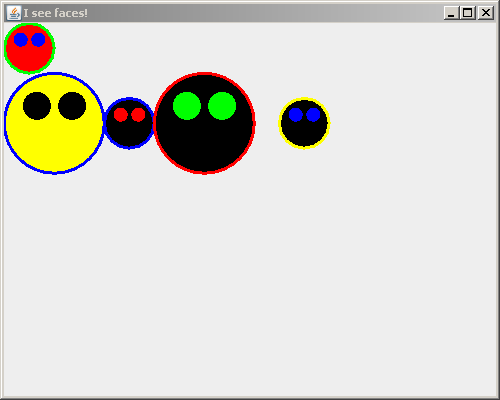
Stage 3. Filled Faces appear, with outlines and eyes, but no mouth yet
-
Augment/modify your documented stubs for Face to include (at this point):
- default constructor also sets the Face's outline color and eye color
- constructor also sets the Face's outline color and eye color to the given values
-
In FacesComponent, comment out the call to testFaceDrawingStage2 and comment in the call to testFaceDrawingStage3.
- So at this stage, FacesComponent should only display several Faces, but with no outline and no eyes and mouth yet, as in the picture .
- Internally, your program should use the constructors and methods listed above at this stage.
-
Modify your documented stub for FacesComponent to indicate that it (at this stage)
Displays filled faces with outlines and eyes, but no mouth yet
since that is all that FacesComponent should do at this stage.
- Implement Face and MyComponent per this stage and test your documented stubs.
- So at this stage, MyComponent should only display several Faces, with outlines and eyes but no mouth yet, as in the picture .
-
Get the outlines working first. That should be easy.
You might want to make the outline with a thicker-than-default line, like this:
    // Make lines 3 times their default thickness
    graphics.setStroke(new BasicStroke(3.0f));

       ... // Draw (using the thicker lines)

    // Reset line thickness to its default
    graphics.setStroke(new BasicStroke(1.0f));
-
To draw the eyes:
- Use the given methods to get the upper left corners of the eyes. If you would like more practice with translate an rotate, the eye drawing can be done without the trigonometry as well, but this is not required.
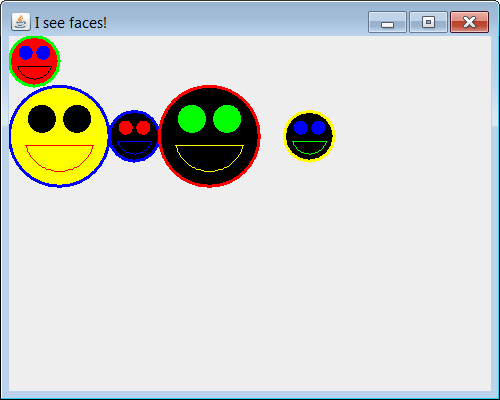
Stage 4. Filled Faces appear with outlines, eyes and mouths
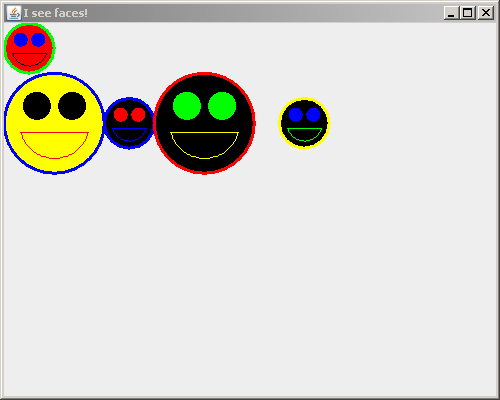
-
Augment your program to draw the mouths of your Faces, as in the picture. Include the mouth color in your non-default constructor.
-
In FacesComponent, comment out the call to testFaceDrawingStage3 and comment in the call to testFaceDrawingStage4.
- So at this stage, FacesComponent should only display several Faces, but with no outline and no eyes and mouth yet, as in the picture .
- Internally, your program should use the constructors and methods listed above at this stage.
-
Use an Arc2D.Double object to draw the mouth. Look up its documentation as needed, but briefly:
- An Arc2D.Double is constructed as part of a circle.
- The first two arguments to Arc2D.Double's constructor are the upper-left corner of the bounding box (NOT the center) of the arc's circle.
- The next two arguments are the width and height (NOT diameter, NOT radius) of the bounding box of the arc's circle.
- The next argument is the degrees (NOT radians) to travel along the arc's circle to get to the beginning point of the arc.
- The next argument is the degrees to continue along the arc's circle to get to the ending point of the arc.
- The last argument is the way to “polish off” the arc, for example to draw an Arc2D.CHORD.
- Refer to the Geometry of a Face diagram for the numbers to use to construct your Arc2D.Double.
- Don't get hung up on the geometry or the way that Arc2D.Double works! Get help if your mouths don't come around quickly!
Sun Instructions
Stage 1. Create SunViewer and SunComponent
-
Add the SunViewer and SunComponent to your project
- Right-click on the (default package) item under the src folder. Select New --> Class. Set the name to SunViewer and select "public static void main(String[] args)"
- Repeat the above, but name it SunComponent, do not select the main method, and set the Superclass to JComponent
- The SunViewer size should be 750 wide and 600 tall.
-
Override the paintComponent method of the SunComponent class.
- Make sure to call the super class's paintComponent method to make sure it does its work. See the FacesComponent if you're not sure how to do this.
-
Place the following constants in the SunComponent class.
- private static final double LITTLE_SUN_SIZE = 30.0;
- private static final double LITTLE_SUN_SEPARATION = 100.0;
- private static final int NUM_LITTLE_SUNS = 5;
- private static final double LITTLE_SUNS_Y = 400.0;
- private static final Color LITTLE_SUN_COLOR = Color.RED;
- private static final double LITTLE_SUNS_X_OFFSET = 50;
Stage 2. Creating the Sun class
-
Before we start putting together a Sun here are some notes about how a Sun is drawn:
- The x and y values stored in a Sun make the upper left point of the Sun when drawn.
- The space between the circle of a Sun and it’s rays is equal to 20% of the Sun’s circle’s diameter: (RAY_DISTANCE_FROM_SUN_SCALE)
- The length of a ray is 50% of a Sun’s diameter: (RAY_LENGTH_SCALE)
- The width of a ray is 10% of a Sun’s diameter: (RAY_WIDTH_SCALE)
- The circleDiameter field is the diameter of the circle in the center of the Sun, not the entire size of the Sun.
-
Create the Sun class
-
Add the following constants to the Sun class:
- private static final Color BORDER_COLOR = Color.BLACK;
- private static final int NUMBER_OF_RAYS = 8;
- private static final double RAY_LENGTH_SCALE = 0.5;
- private static final double RAY_WIDTH_SCALE = 0.1;
- private static final double RAY_DISTANCE_FROM_SUN_SCALE = .2;
- private static final double DEFAULT_SUN_DIAMETER = 100.0;
- private static final double DEFAULT_SUN_X = 100.0;
- private static final double DEFAULT_SUN_Y = 100.0;
- private static final Color DEFAULT_SUN_COLOR = Color.YELLOW;
-
Add the following instance fields to the Sun class:
- x - a double representing the x position of the upper left of the Sun's center circle
- y - a double representing the y position of the upper left of the Sun's center circle
- circleDiameter - diameter of the center circle of a Sun
- rayLength - the length of each ray of a Sun
- rayWidth - the width of each ray of a Sun
- rayDistanceFromSun - the distance from the center of the sun to the beginning of a ray
- color - the fill color for the Sun
-
Create a default constructor for the Sun class.
- Use as many of the constants defined above as possible when setting values into the specified instance fields.
-
Create a constructor with the following parameters:
- x - The upper left x value for the Sun's main circle
- y - The upper left y value for the Sun's main circle
- circleDiameter - The diameter of the Sun's main cricle
- color - The color to use to fill the Sun
Set the instance fields based on the values provided to the constructor.
Stage 3. Draw your first sun
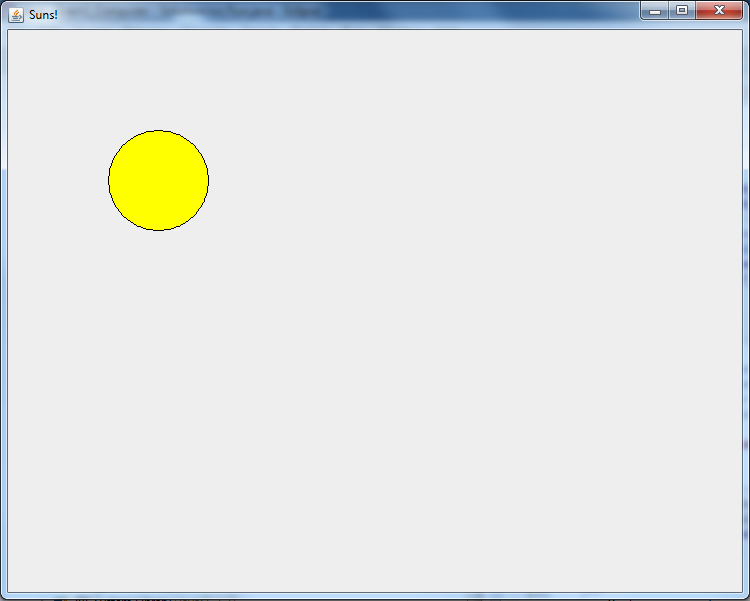
Default sun without rays
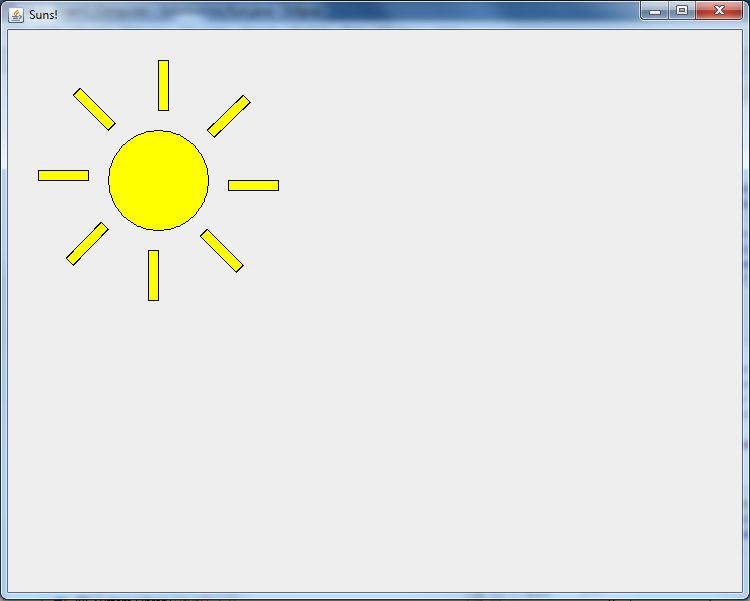
Default sun with rays
-
In the SunComponent's paintComponent method,
create a Sun using the default (parameterless)
constructor, then draw it to the frame by
calling the drawOn method.
-
In the Sun's drawOn method, draw the center circle for the Sun based on its x and y values and the circleDiameter.
- Make sure to fill it with the Sun's color
- Make sure to draw the border with the BORDER_COLOR
- Be sure to test it shows up correctly before you go on to drawing the rays!
-
-
Draw the rays in for the circle.
- Creating a drawRay method that takes a Graphics2D object and an angle can make things easier.
- The drawRay method would be called in in a loop from the drawOn method in Sun
- The Graphics2D rotate and translate methods will be very helpful when drawing rays (you may want to call translate in drawOn before you call drawRays)
- Be sure to test that it shows up correctly before you go on to drawing a bunch more suns
Stage 4. Drawing more suns
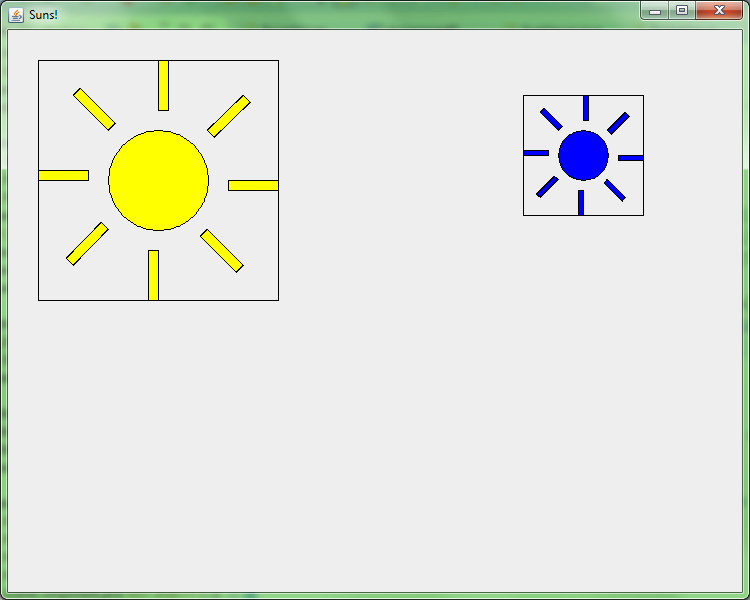
With guide rectangles to verify sun positioning is correct
Adding little suns!
-
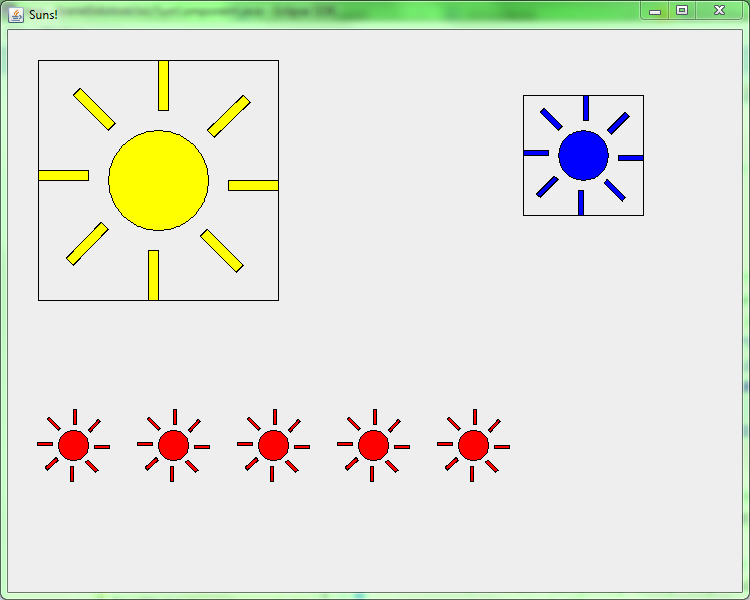
Test that your positioning is working properly. Add this code to SunComponent's paintComponent method:
		//draws a rectangle around the default sun
		g2.drawRect(30, 30, 240, 240);

		//draws a rectangle around a new sun in a particular position
		s = new Sun(550, 100, 50, Color.BLUE);
		s.drawOn(g2);
		g2.drawRect(515, 65, 120, 120);
- Don't modify the parameters in the above code! If the Sun position and the rectangle don't match, the problem is the way you are drawing suns!
-
Modify SunComponent's paintComponent method create multiple little Suns (use NUM_LITTLE_SUMS for the exact number), and draw them to the screen
- The little suns should start at x = LITTLE_SUNS_X_OFFSET and should be separated by the amount in LITTLE_SUN_SEPARATION
- The little suns should be drawn in LITTLE_SUN_COLOR
- Use a for loop to do this! Don't hard-code each sun indiviudally!
- It should appear as the item on the right.
Scene Instructions
Stage 0. Create the SceneViewer, SceneComponent, and Scene classes
-
Create the SceneViewer and SceneComponent using the same process as for Faces and Suns
- There is no Scene class
- Set the frame size to 750x600
Stage 1. Create Scene
-
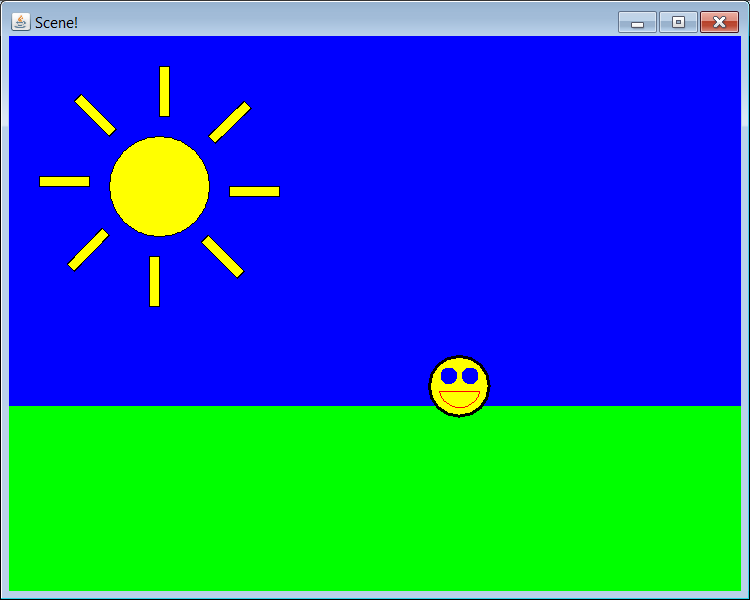
Create a sky for the Scene by drawing a blue rectangle in the upper 375 pixels of the component.
-
Create grass for the Scene by drawing a green rectangle in the rest of the component.
Stage 2. Finish Scene
-
Add a Sun at the default location to the SceneComponent.
-
Create a Face at 450, 350, with a radius of 30, a face color of yellow, an outline color of black, an eye color of blue, and a mouth color of red. Draw it to the SceneComponent.
-
Make sure it appears like the image on the right.
-
NOTE: This should only take a few lines of code. If you find yourself adding more than 4 or 5 lines, you're probably doing too much work.
Turn-In Instructions
Add your files to source control: Right-click on the project, then select Team --> Commit. Be sure to add a brief commit message that describes what you have done. If you choose to commit a single file instead, you can right-click on that file and select Team --> Add to Version Control. However, you must commit that file in order for it to be posted on the SVN server.
Commit your project to your individual repository often is strongly encouraged, not only when you are done.
- Make sure that you have no compiler warnings left.
- Magic numbers in your
FacesComponent class are OK, but you should otherwise use good style. So, consider doing a Control-shift-F on each of your files before your final commit.