CSSE 221: Introduction to Software Development Honors
SwingDemo

You will do this exercise by yourself, but be quick to ask questions of your instructor, student assistants and classmates as desired.

Goals

This exercise will let you:

  • Explore how to create a basic Graphical User Interface (GUI).
  • Learn to avoid some of the pitfalls in GUI creation.
  • See how Event-Driven Programming works.
  • Improve your skill at using an Application Programming Interface (API), in particular, the Swing API.

Grading rubric

You start with 100 points. For each stage that is missing or implemented incorrectly, you lose 10 points.

  • So if you do nothing, your score is negative!
  • This grading scale is chosen to make sure you do ALL of this very useful project.
  • Because this is an exploratory exercise, no documentation is required.

    • However, you should use good style, as usual, and your grade may be reduced if you do not do so.
    • Control-shift-F is helpful to format the file you are working on!

Overview

You will implement this project in stages, testing at each stage to see if the project works correctly through that stage.

  1. Read the stages of your iterative enhancement plan (i.e., the subheadings of the next section).

Implement the project

Implement according to the following Iterative Enhancement Plan (IEP):

Stage 1. The 400 x 300 frame appears

  1. Open Eclipse.
  2. Create a new Java project called SwingDemo (spelled just like that — one word, capital S, capital D).
  3. Create a new class called Main with the usual main method.
  4. In main, construct a new SwingDemoFrame()
  5. Create a SwingDemoFrame class. (Use Quick Fix!) Make it extend JFrame.
  6. Create a no-parameter constructor in SwingDemoFrame that contains the following statements:
      this.setSize(new Dimension(400, 300));
      this.setDefaultCloseOperation(JFrame.EXIT_ON_CLOSE);
      this.setTitle("Swing Demo");
      this.setLayout(new FlowLayout());
    

    • As usual, use Quick Fix to insert the required import   statements.
  7. Back in main, apply the setVisible method to your constructed SwingDemoFrame, passing it true as its argument.
    • For example, your statements in main might be:
    • 
          JFrame swingingFrame = new SwingDemoFrame();
          swingFrame.setVisible(true);
      
      
  8. Run your application, if you have not already done so.
    • It should look like the picture to the right.
  9. Add your SwingDemo project to your individual repository for this course.
Stage 1: Frame appears

Test your understanding: Answer these questions to yourself, but be quick to discuss them with your instructor, a student assistant or a classmate if you are unsure of your answer.

  • What questions do you have about the above statements or the process so far?
  • Why are we constructing a class that extends JFrame instead of just constructing a JFrame and telling the constructed JFrame what to do? (The latter works, but ...)
  • Why do you construct a SwingDemoFrame in main but declare it to be a JFrame?
    • Declaring it to be a SwingDemoFrame works, but ...

Stage 2. A label that says "Hello" appears, along with buttons that say "Press me", "Press me too" and "Press me pretty please"

To get a component to appear, you need to construct it, then add it to the component on which it is to appear. So:

  1. In SwingDemoFrame's constructor, construct and add a new JLabel whose text is "Hello".
  2. Also construct and add a new JButton whose text is "Press me".
  3. Also construct and add a new JButton whose text is "Press me too".
  4. Also construct and add a new JButton whose text is "Press me pretty please".
  5. Commit your project to your individual repository at the end of this and EVERY stage.
Stage 1: Label and buttons appear on frame

Test your understanding:

  • Do you understand what add does? What kinds of things have an add method? What kinds of things can the add method take as its argument?
  • Do you understand how FlowLayout lays out components? (Try resizing the application after it starts, especially making it very narrow and then very wide.)
  • Do you understand why using a LayoutManager like FlowLayout is a good idea? (What is the alternative, and why is it worse?)
  • Do the buttons do anything yet when pressed? (Try them!)
  • Your buttons should be local variables, NOT fields. Why?
    • In fact, your buttons don't have to be declared at all, so far at least! That is, you could have statements like:
      
          this.add(new JButton("Press me"));
      
      
  • What questions do you have about the process so far?

Stage 3. A red panel appears between the label and the buttons

  1. To your SwingDemoFrame, construct and add a new ColoredPanel, where ColoredPanel extends JPanel. Note:
    • This means that you create a new class called ColoredPanel in your project. Eclipse will offer to create the class for you (via Quick Fix) if you first construct an instance of it in your SwingDemoFrame.
    • We make this JPanel a subclass of its own because it will have enough code to justify being its own type of thing.
    • Later in this exercise the JButtons will have enough code to justify converting them to classes of their own too.
  2. In its constructor, the panel should set its preferred size to 200 x 200, using its setPreferredSize method.
    • Pitfall: Using the setSize method on a JPanel. Use setSize only for JFrame's.
    • The setPreferredSize method needs a Dimension as its argument.
      • So construct a new one, giving it 200 and 200 as its arguments.
      • See your SwingDemoFrame's constructor for an example of constructing a Dimension on the fly.
  3. The panel should set its background color to red.
    • Hint: As usual, type this followed by a dot and examine your options. One will look very appropriate!
  4. If you haven't already done so, make your application look like the picture to the right, with the red panel after the label and before the buttons.
    • The trick is to add the panel after adding the JLabel and before adding the JButtons.
Red panel added between label and buttons

Test your understanding:

  • What determines the order in which objects appear in a component whose LayoutManager is a FlowLayout?
  • Do you understand how to use this followed by a dot to figure out how to get your components to look/behave as you wish?
  • Why did we have you put the statements that set the panel's size and color in the ColoredPanel's constructor instead of putting them in the SwingDemoFrame's constructor? (The latter works, but ...)
    • The reason relates to the principle of encapsulation — “hiding the internal representation of an object from view outside of the object's definition” (see Wikipedia on encapsulation).
  • What questions do you have about the process so far?

Stage 4. The label stays on top, the red panel in the center, and the buttons on the bottom, even when the frame is resized

  1. OK, in this stage we want to lay out the frame's components so that the label stays on top, the red panel is in the center, and the buttons stays on the bottom, even when the frame is resized. (See picture to the right.)

    To accomplish this, do all the following:

    1. Bundle the three buttons into a new JPanel, as follows:
      • Construct a new JPanel.
      • Add each of the three buttons to this new JPanel instead of to the SwingDemoFrame.
      • Add the new JPanel to the SwingDemoFrame.
    2. Change the frame's LayoutManager to BorderLayout.
    3. Change the add statements that add the label, ColoredPanel, and new JPanel to the SwingDemoFrame to statements like this:
      
         this.add(BLAH, BorderLayout.PAGE_START);
         this.add(BLAH, BorderLayout.CENTER);
         this.add(BLAH, BorderLayout.PAGE_END);
      
      
      • See the picture to the right showing how BorderLayout works. Ask questions as needed.

  2. Play around with resizing the application, to see the effect of the SwingDemoFrame's BorderLayout combined with the interior JPanel's default FlowLayout.

Project converted to BorderLayout BorderLayout template

Test your understanding:

  • Do you see how to organize your project into components within components (within components...), and how to implement that organization?
  • Do you understand how BorderLayout lays out components? (Try resizing the application after it starts.)
  • Note that BorderLayout changes the size of your ColoredPanel when the frame is resized, where FlowLayout retained the ColoredPanel's preferred size as long as it could fit in the frame.
    • That's just the way that BorderLayout works. If it is not what you want, then you don't want BorderLayout.
    • Try setting the preferred size of your JPanel for the buttons and seeing what happens when you resize the application after it starts.
  • Skim this Visual Guide to Layout Managers, just noting the six pictures it shows of layout managers.
    • Revisit this page when you want to do a more complicated layout in your projects.
  • What questions do you have about the process so far?

Stage 5. A circle appears inside the red panel

You don't usually paint within a frame, instead you usually paint inside a panel that the frame contains. This is done using the paintComponent method. So:

  1. Create a method in ColoredPanel with the signature:
      public void paintComponent(Graphics graphicsObject)
    
  2. The first line of the paintComponent method should ALWAYS be a call to JPanel's   paintComponent(graphicsObject) method. (How?)
    • Pitfall: Omitting this call to the superclass' paintComponent. Nothing shows up when you make this hard-to-spot error.
    • Pitfall: Getting the signature of the overridden paintComponent wrong. Again, nothing shows up when you make this hard-to-spot error.
  3. Next, ask the graphicsObject to draw a circle (oval). Any reasonable size and location is fine.
  4. BONUS: how could you get it to show up in the middle of the panel, even when the application is resized?
A circle appears on the red panel

Stage 6. Another shape appears in the red panel

  1. Draw or fill at least one other type of shape on the panel, with the color of that shape being BLUE.
    • To set the color, try a dot after graphicsObject and see what appears, as usual.
Another shape (here, a filled blue rectangle) appears on the red panel

Stage 7. Clicking the first button causes the background color of the panel to toggle between red and green

For this, you will add an ActionListener:

  • The component that will respond to the event (call it responder) must implement ActionListener.
  • The component that will listen for the event (call it listener) must add the ActionListener like this:
    listener.addActionListener(responder)

Example 1: a panel responds to a button's clicks by having code like this in the panel's constructor:

    this.button.addActionListener(this);


Example 2: A button responds to its own mouse clicks by having code like this in the button's constructor:

    this.addActionListener(this);


Rule of thumb: A button should respond to its own button presses. Following that rule of thumb:

  1. Convert your "Press me" button to a class that extends JButton, instead of a JButton itself.
    • We usually choose names that end in "Button" for JButton classes, e.g. something like TogglePanelColorButton here.
  2. Change the button's text to be "Toggle panel color" instead of "Press me".
  3. Change the frame to be 500 x 300 instead of 400 x 300, to accommodate the fact that the button text is increased. (Try it without this change and note that the third button is offscreen.)
  4. Make the button respond to its own button-press. When pressed, it should ask the ColoredPanel to toggle its background color between red and green. To accomplish this:

    1. In the TogglePanelColorButton's constructor, have this button add itself as an ActionListener (per Example 2 above).
    2. Using QuickFix (perhaps the LAST entry in a long list of QuickFix options), have the TogglePanelColorButton implement ActionListener.
    3. In the actionPerformed method that QuickFix wrote for you, make this TogglePanelColorButton's associated ColorPanel toggle its color between red and green.
      • Perhaps you should implement a toggleColor method in your ColoredPanel class.
      • Since the button asks the ColoredPanel to do something, the button must “have” the ColoredPanel. The usual way to implement this is to pass the ColoredPanel to the button in the button's constructor.

You will probably have questions in doing the above; ask away (instructor, student assistants or classmates) — it's OK!

Red panel has toggled its background color to green Green panel has toggled its background color to red

Test your understanding:

  • Do you see how to have listeners and responders, and how to relate them?
  • What types of object can be listeners?
  • What types of object can be responders?
  • Do you see that if we want to follow the rule of thumb and have the button respond to its own button-press, then we must implement the button has-a ColoredPanel relationship?
  • Do you see the general approach for implementing has-a relationships among objects in a GUI?
  • What questions do you have about the process so far?

Stage 8. Clicking the second button causes the label to toggle between "Hello" and "Goodbye"

  1. Proceed much as you did in the previous stage, but implementing the second button this time. In particular:
    • Convert your "Press me too" button to a class that extends JButton, instead of a JButton itself.
    • Change the button's text to be "Toggle label" instead of "Press me too".
    • Make the button respond to its own button-press. When pressed, it should cause the label on the frame to toggle between "Hello" and "Goodbye"

Frame has toggled the label on it to Goodbye Frame has toggled the label on it to Hello

Test your understanding:

  • Do you see the general pattern for responding to button-presses?
  • What questions do you have about the process so far?

Stage 9. Clicking the third button causes the circle to move 10 units left

In this state, you will implement a crude form of animation — repeatedly pressing the third button moves the circle.

  1. Proceed much as you did in the previous stages, but implementing the third button this time. In particular:
    • Convert your "Press me pretty please" button to a class that extends JButton, instead of a JButton itself.
    • Change the button's text to be "Move circle" instead of "Press me pretty please".
    • Make the button respond to its own button-press. When pressed, the circle on the red/green panel should move 10 units left.
      • Note: When the button tells the panel to move its circle, the button must follow up by asking the panel to repaint itself.
        • Pitfall: Forgetting to ask the object to repaint. You can spot this error by minimizing-and-restoring the application, which forces a repaint; if the object is redrawn properly now (here, the circle is moved), then you know that you forgot to repaint or otherwise update the object.
      • You'll have to think hard about what the button's actionPerformed method should ask its ColoredPanel to do, to have the effect that when the ColoredPanel is repainted the circle is 10 units further left than it previously was. Not a trivial exercise!

  2. Bonus (optional): Make the circle return to the center of the panel when it goes offscreen.
Circle has moved left 10 units Circle has moved left 100 units

Test your understanding:

  • Do you see the general pattern for responding to button-presses?
  • Do you see what is involved when one object (here, the JButton for moving the circle) affects another object (here, its associated ColoredPanel)?
    • In particular, do you see the has-a relationship that is required, and how to implement it?
  • Do you see why you MUST have a field for the circle's x position in this stage?
  • What questions do you have about the process so far?

Stage 10. Clicking inside the red/green panel moves the circle to the mouse click

For this, you will add an MouseListener:

  • The component that will respond to the event (call it responder) must implement MouseListener.
  • The component that will listen for the event (call it listener) must add the MouseListener like this:
    
        listener.addMouseListener(responder)


  1. Make the ColoredPanel implement MouseListener.
  2. Make the ColoredPanel add itself as a MouseListener.
  3. One of the required methods when you implement a MouseListener is mouseClicked. Implement this method, making it change the circle's position to the mouse position (and do a repaint). You can leave the 4 other MouseListener methods in their do-nothing implementations.
Circle has moved to mouse

Test your understanding:

  • Do you see the general pattern for responding to mouse-presses? Do you see that it is very similar to the pattern for responding to button-presses?
  • What questions do you have about the process so far?

Stage 11. Display a pop-up message

You have seen two ways to display data on the screen:

  • Add a Swing component, e.g. a JLabel, to a JFrame or JPanel.
  • Draw on a JPanel by overriding its paintComponent method.

Two other ways to display data on the screen are:

  • Print on the console by using System.out.println.
  • Display a pop-up message by using JOptionPane, as follows:

  1. First, in main, display a message on the console that says something clever, just for practice.
    • It doesn't need to be very clever -- full credit for any message!
  2. Now, again in main, display a pop-up message that says something else clever, by using a statement something like this:
    
        JOptionPane.showMessageDialog(null, "Hi");
    
    
    • The JOptionPane class has many useful methods, including some for getting input from the user via pop-up dialogs, per the next stage.
A clever pop-up message

Test your understanding:

  • Do you see how to display messages in a pop-up dialog?
  • What questions do you have about the process so far?

Stage 12. Getting input from the Console and via a Pop-up Dialog

You have seen that you can get input from the user via button-presses and mouse clicks. Two other ways to get input from the user are:

  • From the Console, by using a Scanner object.
  • From a pop-up dialog (akin to the pop-up message you did in the previous stage).
This stage explores both of these.

  1. Let's first explore getting input from the Console by using a Scanner object. To that end, at the beginning of main:

    1. Construct a new Scanner, giving it the input console System.in.
      • That is, put a statement like:
        
            Scanner input = new Scanner(System.in);
        
        
    2. Use your Scanner object to get an int from the user.
      • Hint: As usual, try typing a dot after your scanner variable and see what's available to get the next integer that the user enters.
      • Display a “prompt” on the console to prompt the user to enter this number (and in the next step, two more numbers), as indicated in the pictures to the right.

    3. Repeat the previous step twice more, so that you get three int values from the user.
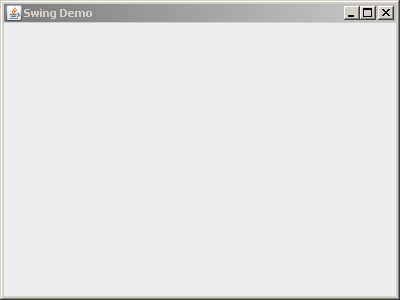
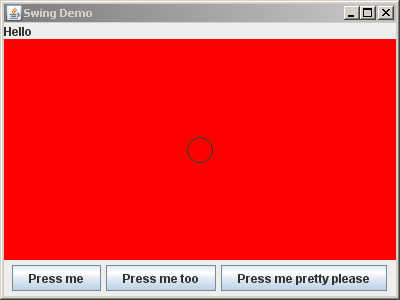
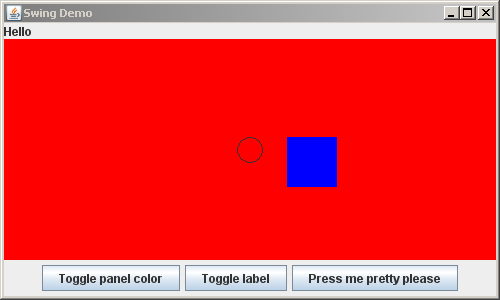
    4. Finally, arrange for your SwingDemoFrame to use these three int values 
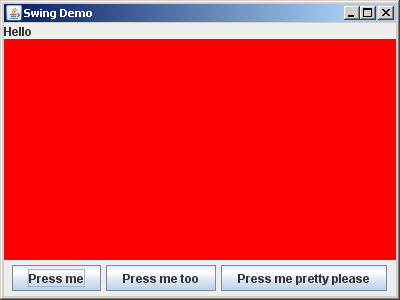
to construct a Color to which the ColoredPanel sets its own color.
      • So the ColoredPanel will be whatever color the user requests, instead of always being red.
      • The user should input numbers between 0 and 255, inclusive, for the amount of red, green, and blue, respectively, in the Color for the ColoredPanel. You don't have to enforce this restriction; it is just what the user should do.
  2. Now let's try getting input by using a pop-up dialog. To that end, still in main:
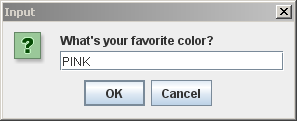
    1. Display an input dialog that asks the user for her favorite color, by using the JOptionPane.showInputDialog method omething like this:
      
          JOptionPane.showInputDialog("What's your favorite color");
      
      
    2. Store the returned value from the call to showInputDialog as a String; that returned value is whatever the user entered in the dialog box.
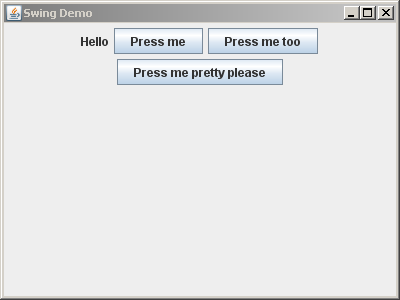
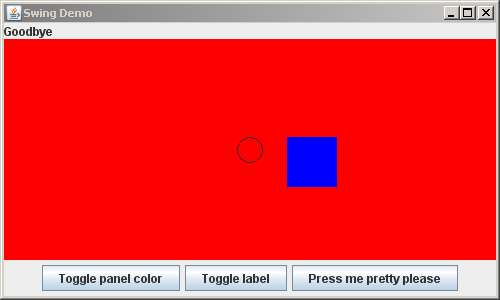
    3. Finally, add to the label that appears on the SwingDemoFrame to indicate the user's favorite color (e.g., “Hello, my favorite color is PINK”), as shown in the pictures to the right.
Pop-up question asking what is your favorite color Input from the console of three numbers for the amount of red, green and blue Frame with components, including label indicating user's favorite color A clever pop-up message

Test your understanding:

  • Do you see how to use a Scanner to get console input from the user? Could you easily learn how to use the Scanner to get inputs of type double or other types?
  • Do you see how to get String input in a pop-up dialog? What class would you investigate to find out how to get more sophisticated input from pop-up dialogs?
  • What questions do you have about the process so far?

Stage 13. Something else novel appears on the frame

  1. Skim this wonderful Visual Guide to Swing Components, just noting the wide variety of components that you can use in Swing.
  2. Add some Swing component (other than JButton or JPanel) from the above link to the right-hand-side of your frame.
    • Your new component does NOT have to do anything; it just has to be plain that it is not a JButton or JPanel.
A JSlider has been added to the right-hand-side of the frame

In your forthcoming projects you will want to learn more about Swing. The following tutorials from the Java Tutorials are excellent:

Test your understanding:

You should now be comfortable with the following:

  • Displaying a JFrame.
  • Adding components like JPanel, JButton and JLabel to JFrame's and JPanel's.
  • The basic idea and use of a LayoutManager.
  • Responding to button-presses and mouse-clicks.
  • Implementing simple has-a relationships.
  • Displaying information to the user by:

    • Adding components to a JFrame or JPanel
    • Drawing on a JPanel
    • Printing on the console
    • Displaying a pop-up message
  • Getting information from the user by:

    • Using a Scanner for console input
    • Displaying a pop-up input dialog
    • Button presses and mouse clicks

If you have questions about ANY of the above, bring your questions to class!

Stage 14. Turn in your work

Commit your project to your individual repository when you are done.