Prelab 1: Preliminaries for the first lab
In this lab, you're going to set up the environment you will use for the rest of 132. Before you come to lab, it's important you start on a few things:
- Download and install Git, along with the SSH tool Git Bash.
- Install WSL2
You should have at least 15 GB of available disk space for this lab (to hold the Linux Subsystem.)
Throughout this entire lab (and this course), this web site assumes you are using the RHIT-supplied image of Windows, though it is possible to do most steps on other systems.
Get Git
Git is the most popular version-control software, a "free and open source distributed version control system designed to handle everything from small to very large projects with speed and efficiency."
You likely already have Git installed. To check, click the windows button and type "git". If you see "Git Bash" show up, you have Git installed, so you can skip to the next step. Otherwise:
- Download Git for your computer from the Git SCM website. (You will probably want to click on "Windows" to get the one for your laptop.)
- Run the installer and follow the instructions. Choose the default settings.
Test an SSH Client
In this lab you will be connecting to other computers using a protocol called SSH. To do this, you need an SSH client. One such client is OpenSSH which is provided through the Git Bash shell on Windows (also native on Linux and Mac).
Open your SSH client, and connect to the following server with the given username and password.
 server:     bandit.labs.overthewire.org
 port:       2220
 login name: bandit0
 password:   bandit0
This can be done with the following command in Git Bash:
ssh bandit0@bandit.labs.overthewire.org -p 2220
You should see something like the following.
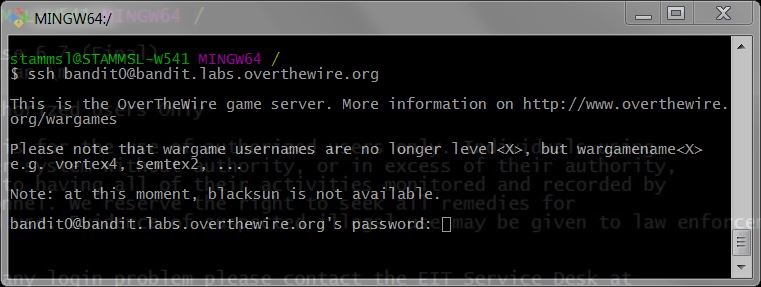
Enter the password (note: it will not display as you type it). You've connected to the server if you see a prompt like
bandit0@bandit:~$
You can log out of a server by hitting CTRL-D, or by entering the command logout.
Install Windows Subsystem Linux 2 (WSL2)
Follow the instructions here:
https://docs.microsoft.com/en-us/windows/wsl/install
After completing the installation by following the instructions, you should have Ubuntu 20.04 (Linux distro) installed on WSL2. To verify, you can run the following command in Windows PowerShell:
wsl -l -v
Note that the
-lis dash lower-case L, NOT dash one.
The output should be something like
NAME            STATE       VERSION
*Ubuntu-20.04    Stopped     2
The
STATEmay be different. But theNAMEandVERSIONshould match exactly.
Post-WSL2 Installation
Install Windows Terminal HERE.
Run this command in your Ubuntu to install the necessary packages:
sudo apt update
You're Ready
Now that you've completed the prelab, you won't be sitting around waiting for downloads during class. When you come to lab, you'll be ready to get to work!