CSSE 120 -- Intro. to Software Development
Homework 8
- Complete the assigned reading for the next session (Zelle
Chapter 6).
- (28, 24 pts) Complete two ANGEL quizzes over
this reading. You'll find them on the course ANGEL page, under
Lessons → Homework → Homework 9 → Defining Functions, More
Functions
- (25 points) File Input
- Checkout the FuncPlot project from your SVN
repository.
- Write a program in module
funcPlot.py that
implements
the following design:
- Prompt the user for a file name
- Open a file with the given name
- Display a graphics window with width 720 and height 400.
- Read each line from the file. For each line, plot a
point on the graphics window. You should assume the lines have the
format specified in funcDump (treat the first number as the x coordinate
and the second number as the y).
- Close the file
- Test your program using your
cos.txt output
from funcDump. (Note: you must place cos.txt in
the same folder as funcPlot.py to read it.) You may also
test using the sample outputs for different functions below. (The
functions are "upside down" because of the graphics coordinate system.
You could fix that by using zellegraphics' win.setCoords() method if
you so desired, but we won't require it.)
- Commit your solutions to your SVN repository.
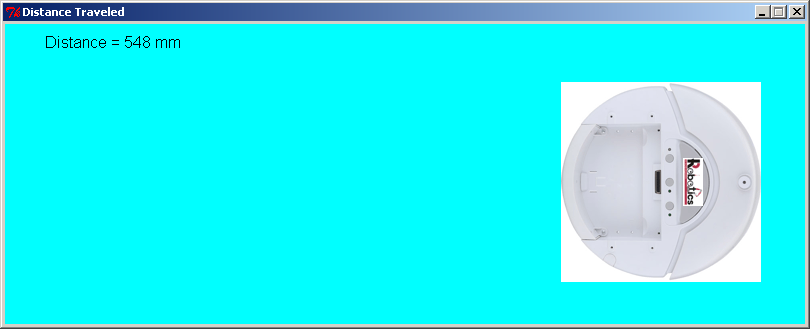
- (15 points) Robot Sensor Reading
- Checkout DistanceTraveled
project from your SVN repository
- This can be
done with your robotics partner or in-class pair programming partner or
individually. Just include all the names in the top of your
code. For this problem you will get the sensor data for
distance and use zellegraphics to show the robot moving across the
screen.
- Run the program to see what code is already included - it
should look like this and ask you to enter your com port in the console
window:
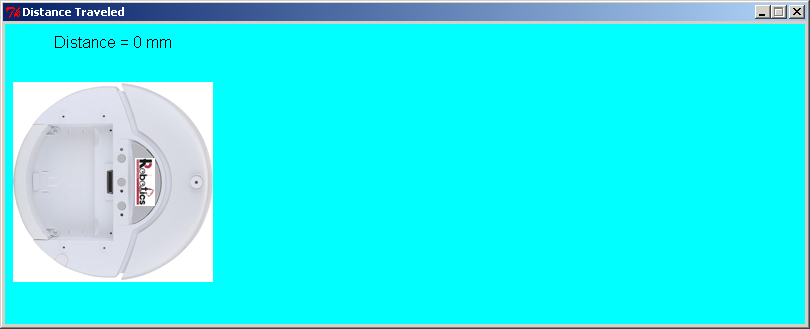
- Read the program to see what code is already included
- Finish the TODO's in the code so that all of the following
happens:
- The Robot image will be moving across the screen as the
robot on the ground moves
- Start the iRobot Create moving in a straight line at a
slow speed
- Poll the robot every 0.1 seconds for 3 seconds to get the
distance
traveled
- Use the distance traveled to move the .gif image
across the screen moving to the right
- In addition to the moving .gif image moving, update the
text object to display the distance traveled
- After 3 seconds pass stop the robot moving but leave the
window open until a user clicks in the window
- Play around with the robot speed and window size, but make
sure the robot finishes still on the screen
When you are finished make sure to commit your code to the
repository. A finished robot run might look like this: