How to Install the MinGW Tools for C/C++
Rose-Hulman Institute of Technology –
Computer Science & Software Engineering
Overview
Follow these directions to the MinGW tools for developing code in C/C++. (
All RHIT laptops came with MinGW installed)
Install the MinGW Tools for C/C++
-
Log in to your regular user account.
-
Download this
MinGW folder and run it. Your browser may warn that "This
file is not commonly downloaded and may harm your computer" , but
run it anyway. (In one dialog box, selecting 'additional options'
allowed it to run. This installation will download various files from
the web.
-
Accept the default installation folder
C:\MinGW. Do
NOT
attempt to place in C:\Program Files\MinGW.
(location cannot
have spaces)
- At the Select Component dialog, check the MSYS
Basic System.
-
Add the C:\MinGW\bin folder to your Windows Path variable. To do this:
-
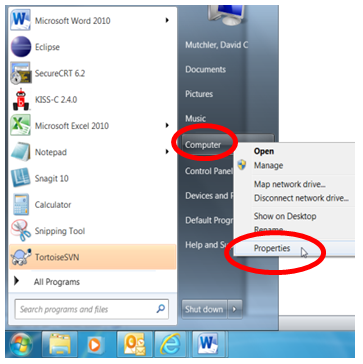
Right-click on Computer in the Start Menu and select
Properties.
-
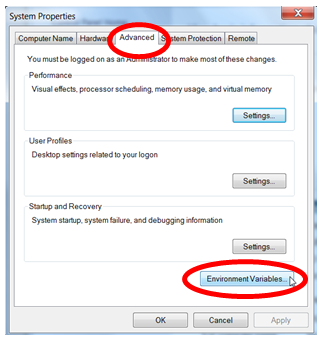
Click on "Advanced System Settings", choose the Advanced
tab, then click Environment Variables.
-
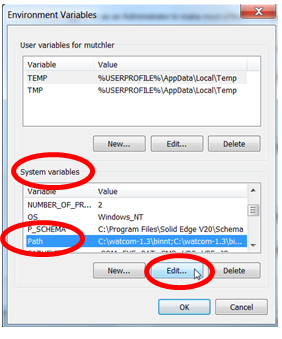
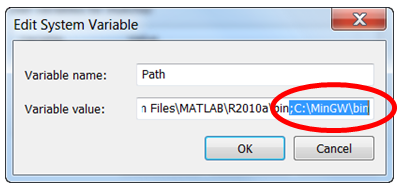
Under System Variables, scroll down and select Path, then click Edit.
-
Carefully (use the right-arrow or End keys) go all the way to the right of the Variable value field.
Be sure not to delete anything!
Deleting here breaks things!
-
Add to the end of that field (include the semicolon)
;C:\MinGW\bin
-
Click OK three times to exit.
-
Next, verify that the MinGW install was successful. Here’s how:
-
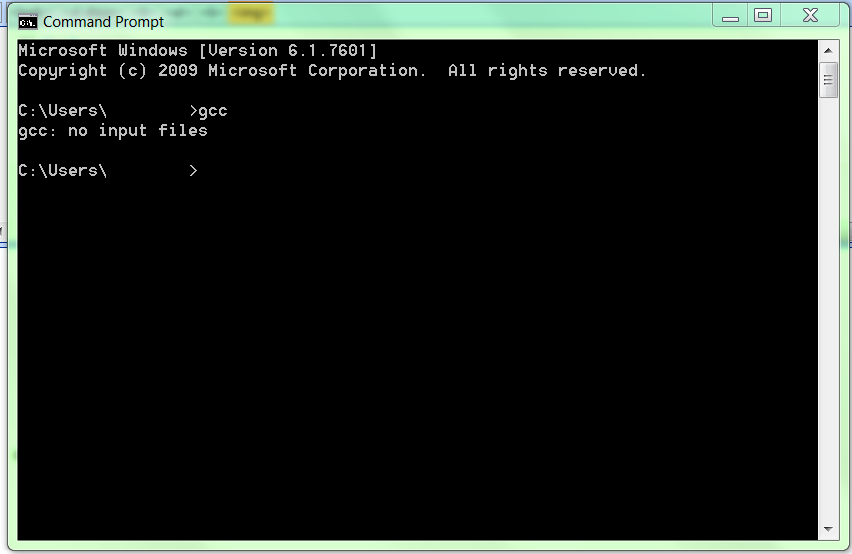
Click Start and type cmd in the search field, then press Enter.
-
In the window that appears, enter gcc and press the Enter key
again.
-
You should get a response gcc: no input files. This means that Windows could find the gcc program, which is what we want. If you get any other response, then verify that you set the path correctly in step
5e above. (For the curious, gcc stands for Gnu C Compiler.)