SwingDemo
CSSE 221 – Fundamentals of Software Development Honors
Fall 2008–2009
Work on this exercise by yourself:
- Your instructor will demo the entire exercise.
Try to follow along as your instructor does the demo.
- Ask questions of your instructor, student assistants and classmates as desired.
Goals
The goals of this exercise are to apply and hence reinforce your understanding of:
- The use of UML class diagrams
to brainstorm/develop and then communicate designs
- Developing a Graphical User Interface (GUI)
by using Swing components
- Implementing interfaces , including interfaces
for event-driven programming
- Implementing by using documented stubs
and an iterative enhancement plan
- Pair programming
Overview
You will design and implement a computer version of the 19th century puzzle called the
Fifteen Puzzle.
- See the
Wikipedia article on the Fifteen Puzzle
for a description of the puzzle.
- You will implement by using:
- pair programming
- documented stubs
- an iterative enhancement plan
- Deliverables, as described below, include a UML class diagram, a project plan,
an iterative enhancement plan, html javadoc-generated documentation, and your code.
There is no report associated with this project.
|

|
Specification
- Basic gameplay.
Your program must:
- Display a random but solvable 15-puzzle.
- The display does not have to look exactly like the picture above.
Be creative.
- Allow the user to move tiles in an attempt to solve the puzzle.
- Display a congratulatory message when the user solves the puzzle.
- User interface. Your program must allow the user,
via a well-designed user interface of your own choosing, to do the following:
- Display a new, random but solvable, game.
- Change the puzzle from the current dimensions (initially 4 by 4)
to an m by n puzzle,
for any reasonable m and n.
- Changing dimensions should cause a new, random but solvable, puzzle to be displayed.
- See the names of the authors of the program, as well as a brief bio for each.
- Undo the previous move, or redo the previous undo.
- Multiple undo's/redo's, all the way back to the beginning of the player's
attempted solution to the puzzle, should be allowed.
- Reset the puzzle to the same configuration that it started at
when the user began her attempt to solve it.
- Platform. Your program must be able to run as either a Java Application
or a Java Applet.
- Implementation requirements. Your program must:
- Use Swing components
- Have a clearly documented, object-oriented design that could be easily extended to incorporate
additional features
- Have code that is clear, is easily extended, and obeys Sun's code conventions
- In Eclipse, Source ~ Format enforces these code conventions
- Be reasonable in its use of space and time
- Feature a good GUI design -- use common sense and perhaps look at
Ben Shneiderman's Eight Golden Rules of Interface Design
and/or Gerd Waloszek's
Golden Rules for BAD User Interfaces
- As an aside: the presentation of Schneiderman's Eight Golden Rules,
per the above link,
is part of the way-cool
Case of the Killer Robot
case study on Software Engineering ethics.
- Be implemented by using documented stubs and pair programming
and an iterative enhancement plan.
- Additional functionality. You may implement additional features
if you wish, but you receive full credit simply for the above.
Deliverables and Turning in your work
Recall that you work in pairs on this project.
Let xxx denote one partner's username and yyy
denote her partner's username,
where xxx is alphabetically before yyy.
- For example, clintow
is alphabetically before reaganrw.
Your instructor created a repository whose name is:
csse221-200910-Fifteen-xxx-yyy
You should place the following into that repository:
- A folder called Fifteen that is your Eclipse project.
- You create your own Eclipse project,
being sure to call it Fifteen.
- As usual, your Eclipse project should include approprate src,
bin, and doc subfolders.
- A PDF document called FifteenUML that is your UML class diagram.
- A PDF document called FifteenProjectPlan that is your project plan,
including your iterative enhancement plan.
All of the above should be committed frequently,
so that we can observe the progress of your project as you work on it.
You may have additional documents in your repository if you wish,
for example a UMLet or Violet class diagram and a Microsoft Word project plan,
but we will examine only the PDF documents and your Eclipse project.
Work on this exercise by yourself,
but ask questions of your instructor, student assistants and classmates as desired.
Goals
The goals of this exercise are to:
- Create basic GUIs.
- Learn to avoid some of the pitfalls in GUI creation.
The Demo and Exercise: Work with your instructor to create a basic GUI.
Start by reading the main steps of the IEP. Then create a UML design for the
project. Then start implementing according to the following 6-step Iterative Enhancement Plan (IEP):
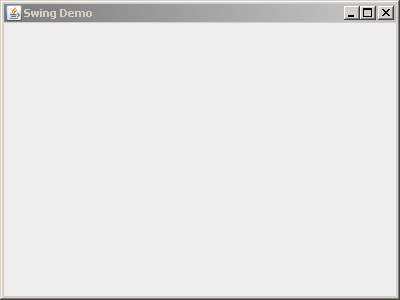
Stage 1. The 400x300 frame appears
- Open Eclipse.
- Create a new project called SwingDemo.
- Create a new class called Main
with the usual main method.
- In main, construct a new SwingDemoFrame()
- Create a SwingDemoFrame class. (Use Quick Fix!)
Make it extend JFrame.
- Create a no-parameter constructor in SwingDemoFrame
that contains the following statements:
  this.setSize(new Dimension(400, 300));
  this.setDefaultCloseOperation(JFrame.EXIT_ON_CLOSE);
  this.setTitle("Swing Demo");
  this.setLayout(new FlowLayout());
  this.setVisible(true);
|
 |
- What questions do you have about the above statements or the process so far?
- Why are we constructing a class that extends JFrame instead of just constructing a JFrame
and telling the constructed JFrame what to do? (The latter works, but ...)
|
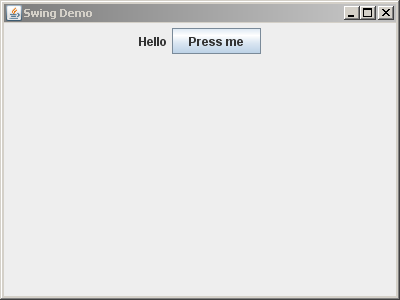
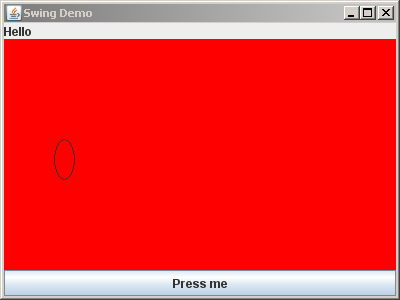
Stage 2. A label that says "Hello" appears, along with a button that says "Press me"
|
To get a component to appear,
you need to construct it,
then add it to the component on which it is to appear. So:
- In SwingDemoFrame's constructor,
construct and add a new JLabel
whose text is "Hello".
- Also construct and add a new JButton
whose text is "Press me".
|
 |
- Do you understand what add does?
What kinds of things have an add method?
What kinds of things can the add method take as its argument?
- Do you understand how FlowLayout lays out components?
(Try resizing the application after it starts, especially making it very narrow.)
- What questions do you have about the process so far?
|
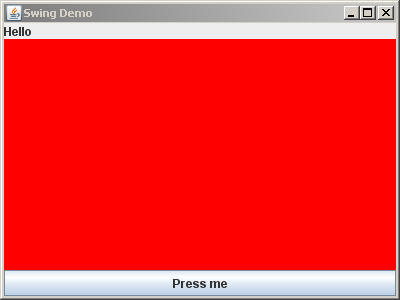
Stage 3. A red panel appears vertically between the button and the label
- To your SwingDemoFrame,
construct and add
a new ColoredPanel,
where ColoredPanel extends JPanel.
- The panel should set its size to 200 x 200,
using its setPreferredSize method.
- Pitfall: Using the setSize method
on a JPanel. Use setSize only for JFrame's.
- The panel should set its background color to red.
- Hint: As usual, type this
followed by a dot
and examine your options. One will look very appropriate!
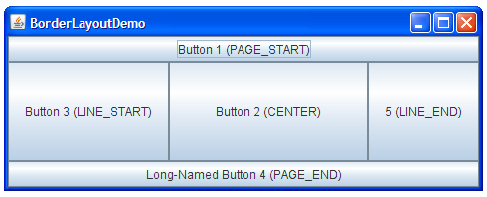
- To get the vertical layout, change the frame's LayoutManager to BorderLayout,
and use statements like the following to lay out the three components as pictured to the right.
this.add(BLAH, BorderLayout.PAGE_START);
|
 |
- Do you understand how to use this followed by a dot
to figure out how to get your components to look/behave as you wish?
- Do you understand how BorderLayout lays out components?
(Try resizing the application after it starts.)
- What questions do you have about the process so far?
|
Stage 4. A circle appears inside the panel
|
You can't paint within a frame, you need to paint inside a panel.
This is done using the paintComponent method.
So:
- Create a method in ColoredPanel with the signature:
public void paintComponent(Graphics graphicsObject)
- The first line of the paintComponent
method should ALWAYS
be a call to JPanel's
paintComponent(graphicsObject) method. (How?)
- Next, call graphicsObject's drawOval method
using an appropriate size and location.
- BONUS: how could you get it to show up in the middle of the screen?
|
 |
Stage 5. Another shape appears in the panel
Please draw or fill at least one other type of shape on the panel.
Stage 6. Something else novel appears on the screen
If you finish early, please experiment with adding another type of component to the screen.
The tutorial on Swing in the
Java Tutorial is very good.
Stage 7. Clicking the button causes the color of the panel to change to green
For this, you will add an ActionListener:
- The component that will respond to the event
(call it responder)
must implement ActionListener.
- The component that will listen for the event
(call it listener)
must add the ActionListener like this:
listener.addActionListener(responder)
Example 1: a panel responds to a button's clicks:
this.button.addActionListener(this)
Example 2: A button responds to its own mouse clicks:
this.addActionListener(this)
Stage 8. Instead of a label, there is a text field at the top of the screen that changes the panel back to red when someone presses
"enter"
Handle this the same way that you did the button, but now the panel will need to know what component generated the event. Use conditions like this:
if (event.getSource() == this.button) // then it was the button that was clicked